
AWS AMI Quick Start Guide
The following has been created to assist with the deployment of the AWS AMI SIEMonster implementation. The following will contain all relevant information on deploying the image provided and the configuration of the individual components as needed. This guide is limited to the deployment only, for any additional information, please consult the SIEMonster documentation.
Please note the following videos assist with getting started quickly.
Adding a user for the SIEMonster V5 AWS marketplace stack deployment
Deploying SIEMonster V5 to the AWS Marketplace
https://youtu.be/-v7_CzO1H7g
Introduction
The SIEMonster SIEM Solution provides organizations from small to large with the ability to monitor their network assets in an affordable and scalable solution whilst providing the latest SIRP and SOAR automation and response.
SIEMonster is a collection of the best open-source security tools, as well as our own, to provide a SIEM for everyone. We showcase the latest and greatest tools for security professionals like The Hive, Cortex, MISP, MITRE, DefetDojo, Suricata, Wazuh, AWS OpenSearch and more to create a SIEM. We have customers all around the world now using our product that was once using Gartner quadrant competitors.
Pricing & Licensing
The AWS pricing may vary per region. Log into your AWS account and view the pricing chart in the AWS Marketplace for more information. Pricing includes the SIEMonster license, and no license management is required.
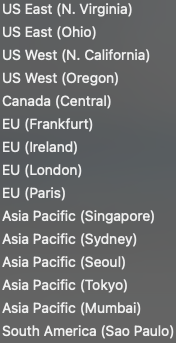
Regions Supported
Regions supported include:
Technical & User Requirements
Requires an AWS account with Route 53 Hosted Zone and registered domain. Optional - existing VPC with availability for 4 x /22 CIDR ranges.
Note: Do not use an AWS Root account for deployment as this is not a requirement.
It is recommended to use an assumed role with administrative access for deployment, followed by AWS EKS cluster least privilege review, see https://docs.aws.amazon.com/eks/latest/userguide/add-user-role.html
Please avoid using a temporary session for deployment.
Verify AWS License Manager to Marketplace integration is enabled for the target region. This is a one-time action when accessing AWS License Manager for the first time.
Please ensure that the EC2 limit is at least 64 for the region chosen for deployment. You can also add more depending on the number of tenants you wish to add. Also ensure that the on-demand is selected and NOT the spot instances.

Deployment
An administrative role is required for deployment. The following roles are created automatically for management: For identification purposes, the prefix for each created role is equal to the cluster name.
OpenSearch service role for management after deployment.
Batch Instance IAM role for EC2,
ECS Task Execution Role Policy,
EC2 Container Service for EC2 role,
EKS list & describe policy,
Submit Batch policy for interaction with Elastic Load Balancers,
Secrets Manager & Security Groups
Roles for Lambda function integration with EKS, Route53, ACM, Secrets Provider and Log Streams.
References: Reduced subset of the Administrator job function https://docs.aws.amazon.com/IAM/latest/UserGuide/access_policies_job-functions.html
License Manager
To enable License manager before the deployment please Type License Manager in the search box at the top of the AWS administration Console.

Select the “AWS License Manager” from the search results.
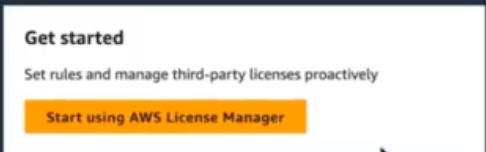
Next Click on “Start Using AWS License Manager”
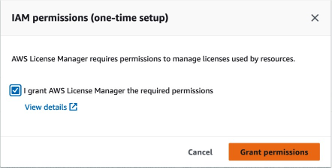
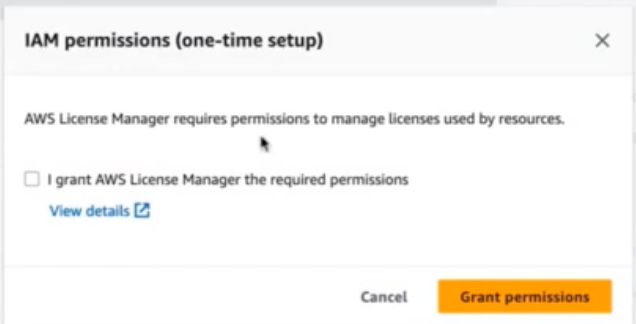
You will be prompted to allow IAM permissions with the following dialog. Tick the box next to “I grant AWS License Manager the required permissions” and then Click “Grant permissions”
Service Quotas
NOTE: If this is a new AWS account, the on-demand service quotas will need to be increased. Please use the following steps.
Loging to the AWS administrator console with the account that will be used to deploy SIEMonster.
In the top right corner where the user account is displayed, Click on the account to expand the menu. It should look like follows
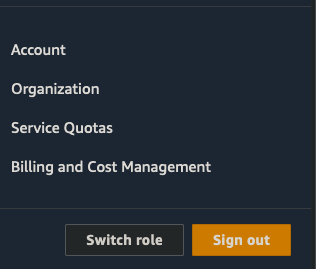
Click on “Service Quotas”
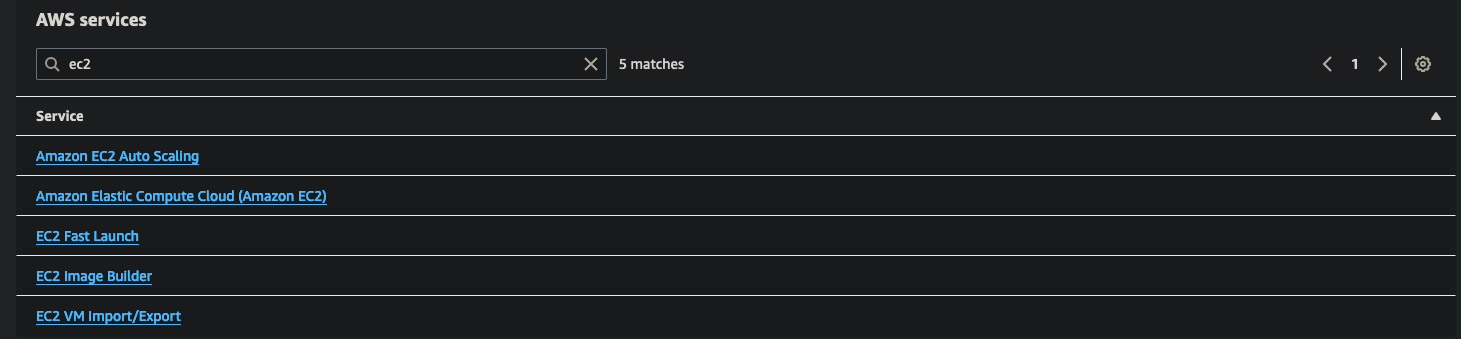
Then Click on “AWS services” on the left side of the screen

In the searchbox type “ec2” and click on “Amason Elastic Computer Cloud (Amazon EC2)
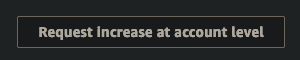
In the next search box Type “on-demand” and then select the “Running On-Demand Standard (A, C, D, H, I, M, R, T, Z) instances

Then Click “Request increase at account level” in the top right corner
Specify at least 50 in the box below “Increase quota Value”.
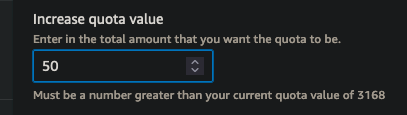
There is no cost involved with setting this limit, charges are only applied for running instances, not the total number allowed as per the quota. This request can take up to 2 hours to complete. You can track the approval on the “Request History Tab” for the specific instance size.
Details of roles and related policy statements for the deployment and management of the application
NOTE⚠️ :To deploy the solution, an AWS Administrative Role should be created that includes full access to the following AWS Services:
CloudFormation EC2 EC2 Auto Scaling Certificate Manager Cloudtrail Cloudwatch Logs EFS EKS ELB ELB v2 | IAM KMS Lambda License Manager MSK OpenSearch Service Route 53 SNS WAF |
Steps to configure:
Add a policy to allow access to the required services – example policy.
Login with this role to perform the deployment from CloudFormation template or Marketplace.
Post Deployment EKS administration
To administer the EKS cluster, an AWS Role should be created with full EKS access and added to the EKS Auth ConfigMap.
Steps to configure:
Add a policy to allow access to the required services – example policy.
Add the roleARN, username and groupname in mapUsers section in aws-auth config
https://docs.aws.amazon.com/eks/latest/userguide/add-user-role.html
kubectl -n kube-system edit cm aws-authLogin with this role to perform system administration.
Post Deployment Monitoring
A lesser privilege AWS Role should be created for the purpose of granting access to Monitoring solutions.
Steps to configure:
Add a policy to allow access to the required services – example policy.
Create a manifest for a Cluster Role - Sample ClusterRole.yaml (Read only pods & pod/logs)
Create a manifest for ClusterRoleBinding or RoleBinding as required.
Sample ClusterRoleBinding.yamlApply the ClusterRole and then the ClusterRole Binding.
kubectl -n kube-system apply -f ClusterRole.yaml
kubectl -n kube-system apply -f ClusterRoleBinding.yaml
Add the roleARN, username and groupname in mapUsers section in aws-auth config
https://docs.aws.amazon.com/eks/latest/userguide/add-user-role.html
kubectl -n kube-system edit cm aws-authLogin with this AWS role to perform system monitoring.
Knowledge Prerequisites
Should be familiar with or have knowledge of:
Familiarity with AWS infrastructure
Basic knowledge of CloudFormation deployment via templates
Basic knowledge of IAM users & roles
Familiarity with of the following AWS services:
Route53
EC2
OpenSearch
MSK Managed Kafka
EFS, S3, ACM
EKS Managed Kubernetes
VPCs
Load Balancers
Security Groups
Billable Services and Guidance
Below is a picture of the AWS Marketplace page with pricing information. The example is Region U.S East, with SIEMonster at $0.452 cents per hour and $0.452 for the EC2 instances for a total of $0.904 cents per hour.

The following additional services are Mandatory or Optional billable services.
AWS Billable Services | Mandatory/Optional |
EC2 | Mandatory |
OpenSearch | Mandatory |
MSK | Mandatory |
EFS | Mandatory |
Route 53 | Mandatory |
S3 | Mandatory |
EKS | Mandatory |
WAF | Optional |
AWS Calculators
The following AWS calculator has been provided to guide you on an estimate of AWS costs.
https://calculator.aws/#/estimate?id=2146e33e1876e0f0767f30bc98a84c2b1ed7f8aa
CloudFormation Deployment
Launching a SIEMonster stack via a CloudFormation Template can be achieved by either using a downloaded template or one provided on the AWS Marketplace.
You can choose either a QuickStart or a Custom install to integrate with your own environment and to provide private zone options with custom certificates.
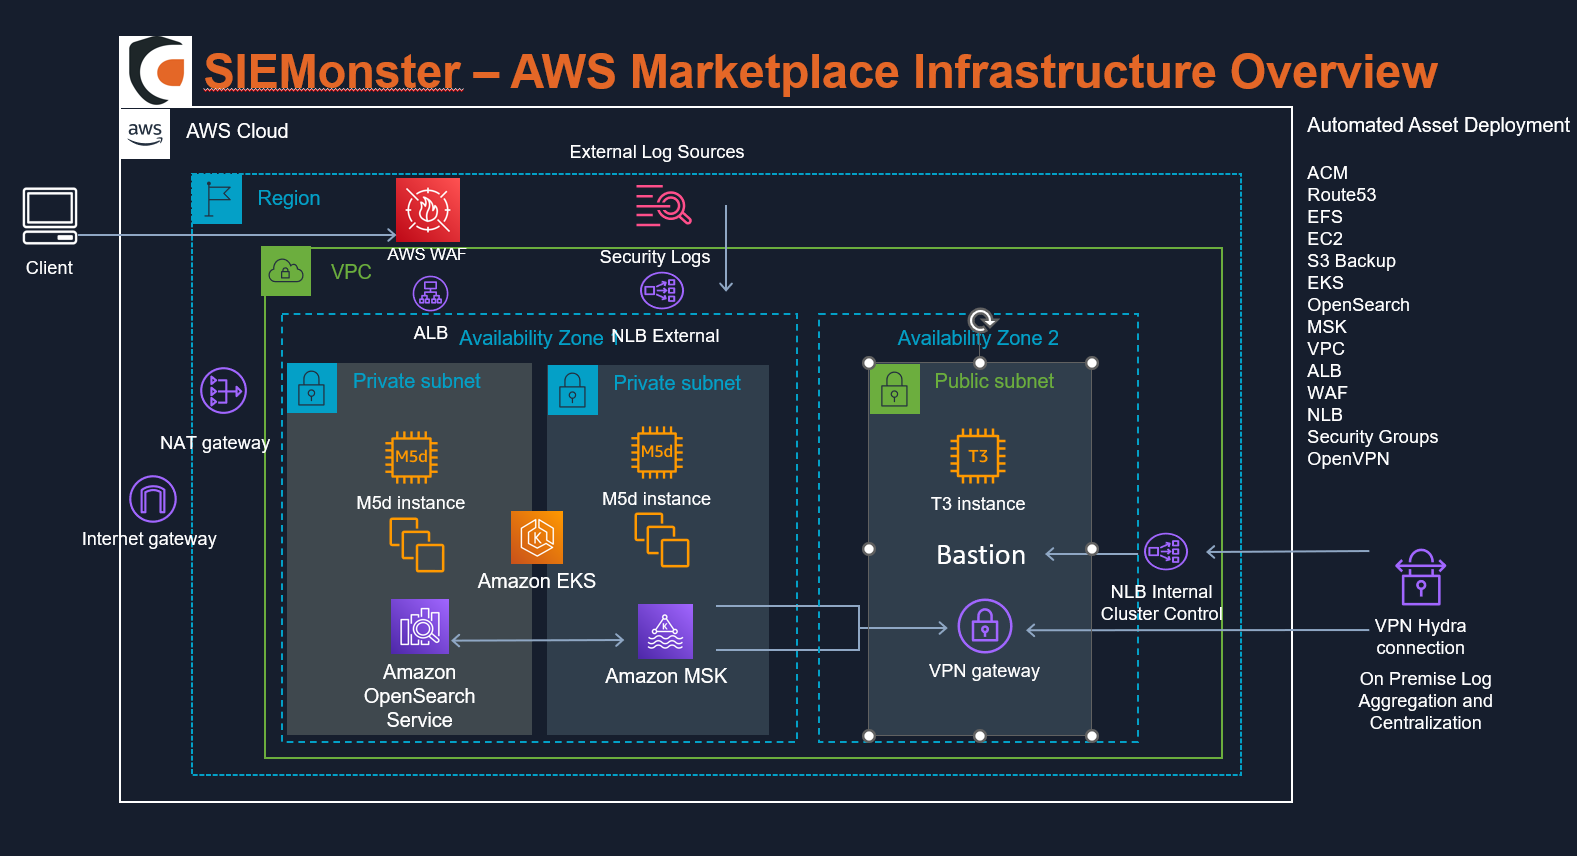
The SIEMonster deployment will install 2 EC2 instances spanning 2 availability zones and a single node OpenSearch service in 1 AZ. Autoscaling ensures that additional nodes (EC2 instances) will be deployed based on number of tenants and system load. Additional charges will be incurred for each new node deployed. Deployment options are limited to single region and 2 AZ configuration. SIEMonster can be installed into a new VPC or to an existing VPC provided that an Internet Gateway is available. 2 Public and 2 Private subnets are required, and suitable defaults are provided. A low-tier Bastion host will all be deployed to provide VPN options for ingestion and cluster SSH access. See Appendix 4.3 – Public Resource Exposure for further details.
Additional AWS infrastructure that will be installed/utilized with this template (see the Topographical Details section for further information).
2 x Network Load Balancers
1 x Application Load Balancer
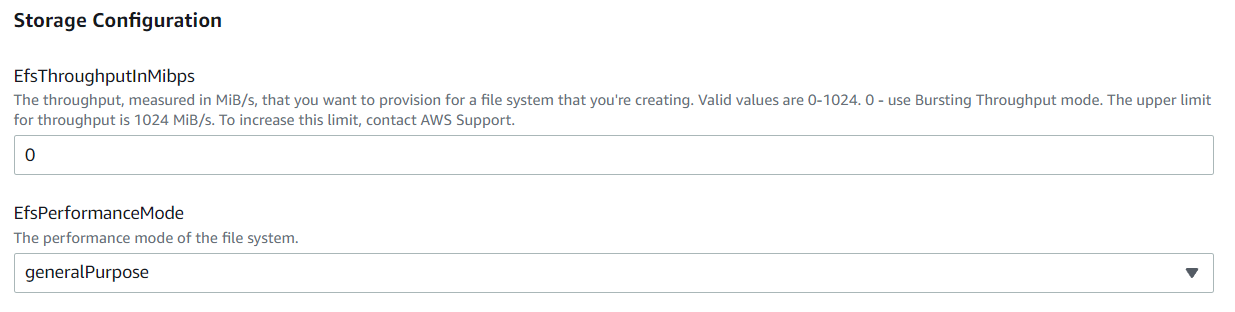
1 x Encrypted EFS volume
AWS OpenSearch
AWS Managed Kubernetes
AWS Managed Streaming for Apache Kafka
AWS EC2
AWS S3 Bucket
AWS ACM
AWS Route 53 for DNS management
When a cluster is created, a Hosted Zone is created just for the cluster. The name of the zone will be <CLUSTER_NAME>.<DNS_ROOT_ZONE_NAME> (variables provided in the CloudFormation Template).
An initial tenant will be deployed as specified in the CloudFormation template/
<TENANT_NAME>>.<CLUSTER_NAME>.<<DNS_ROOT_ZONE_NAME>
Inside this zone, several A records will be created for various services in the SIEMonster application (e.g. wazuh.<CLUSTER_NAME>.<DNS_ROOT_ZONE_NAME>).
Whatever value you provide to DNS_ROOT_ZONE_NAME must already have a NS record configured in the parent domain (see AWS docs for configuring a subdomain as a Hosted Zone). For example, if you set
DNS_ROOT_ZONE_NAME to my-new-zone.siemonster.io - a Hosted Zone named a-new-zone.siemonster.io must be manually created.
The NS record (which is generated by AWS upon zone creation) must be copied to the siemonster.io zone.
It should be noted that it is completely acceptable to use a parent domain for DNS_ROOT_ZONE_NAME. For example, you could set the value to mycompany.io and then have a cluster at my-cluster.mycompany.io
CloudFormation Deployment Steps
Deployment time will take 30-45 minutes plus a further 30 minutes for internal mesh system synchronization and DNS propagation. Refer to ‘Traffic Light’ module health indicators also, e.g., all green good to go.
To launch and configure SIEMonster, you should select it from the AWS Marketplace and start the launch/setup procedure. To do this, use the following steps:
Locate SIEMonster on the AWS Marketplace.
From the SIEMonster product page on the AWS Marketplace, press the Continue to Subscribe button.
From the Subscription page press the Continue to Configuration button.

Version and Location
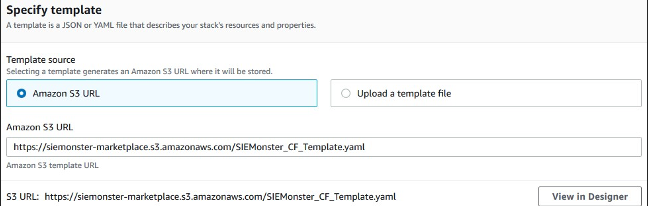
On the Configure this software page, select CloudFormation as your Fulfillment Option.
For the CloudFormation Template, select one of the options below. All Template launches are
Completely independent and will not affect any current resources on the account.
- QuickStart: Launches SIEMonster in a preconfigured HA/clustered environment.
- Custom: Advanced options to integrate SIEMonster into your own AWS VPC etc.Select a Software Version. It is highly recommended to always use the latest version.

Note that the setup will not be finalized, and you will not be charged at this point.
Completing the CloudFormation Template Launch - QuickStart
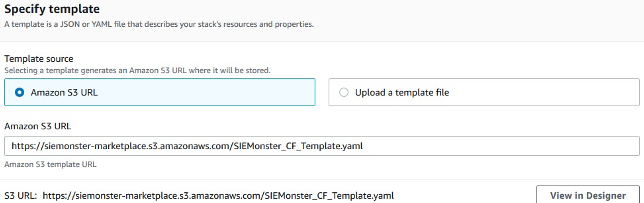
You should now have a completed Amazon S3 template URL field.
Click Next to reach the Stack Details page.
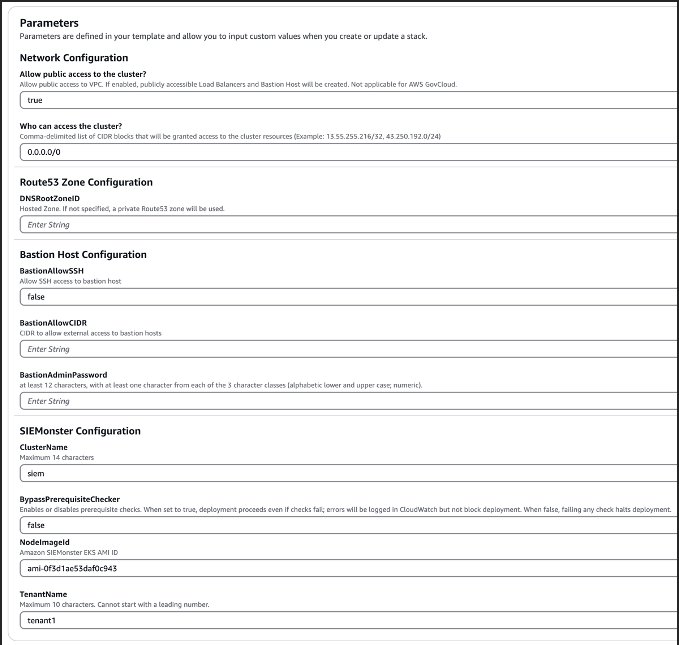
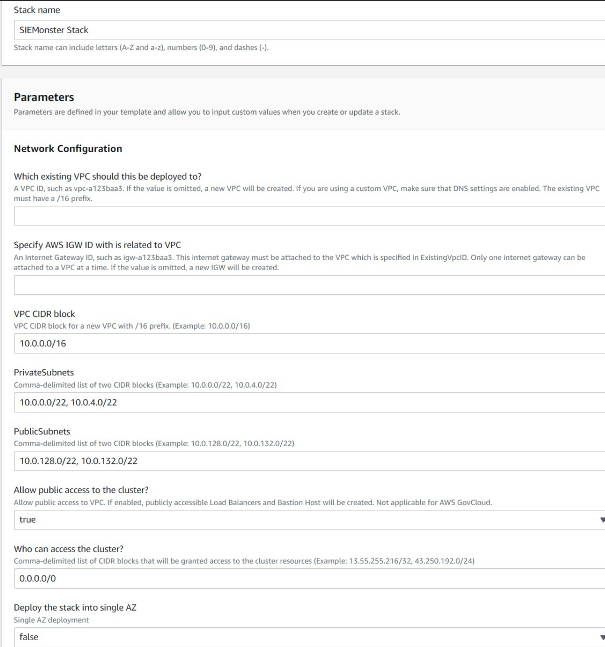
Give your Stack a name and configure the blank details as appropriate for your environment. Ensure you make note of the Service Password entered.
Choose from the list of DNS hosted zones the required zone.
Choose Bastion options for external access.
Choose a cluster name. This will become part of the access URL, e.g., https://<cluster_name>.<dns_root_zone>
Set the BypassPrerequisiteChecker to true to gracefully halt the deployment process if the required prerequisites are not met, otherwise leave as false.
Click Next and then Next again adding any tags as required and accept the AWS IAM creation option
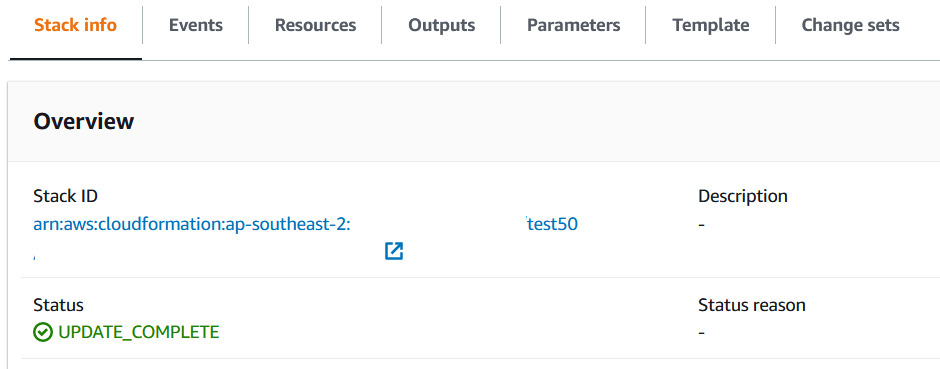
The Stack creation will now begin and will take approximately 30 minutes to complete deployment of all the required infrastructure. A CREATE_COMPLETE status will be shown in the CloudFormation console.
The Stack creation will now begin and will take approximately 30 minutes to complete deployment of all the required infrastructure. A CREATE_COMPLETE status will be shown in the CloudFormation console.
Please allow a further 30-60 minutes for DNS propagation and SIEMonster initialization
Completing the CloudFormation Template Launch – Custom
You should now have a completed Amazon S3 template URL field.
Click Next to reach the Stack Details page.
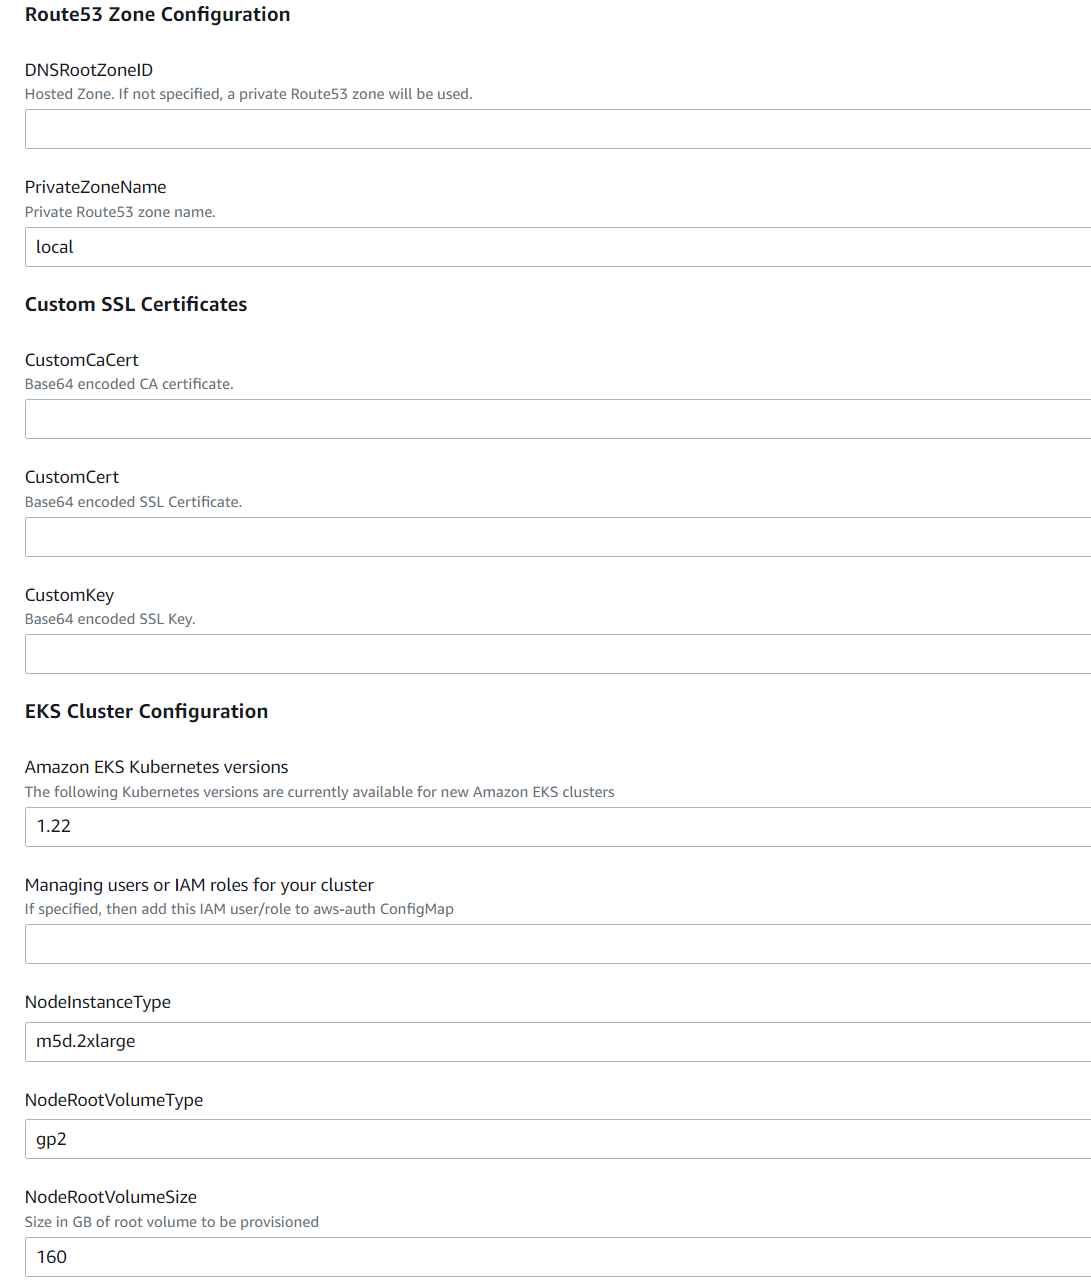
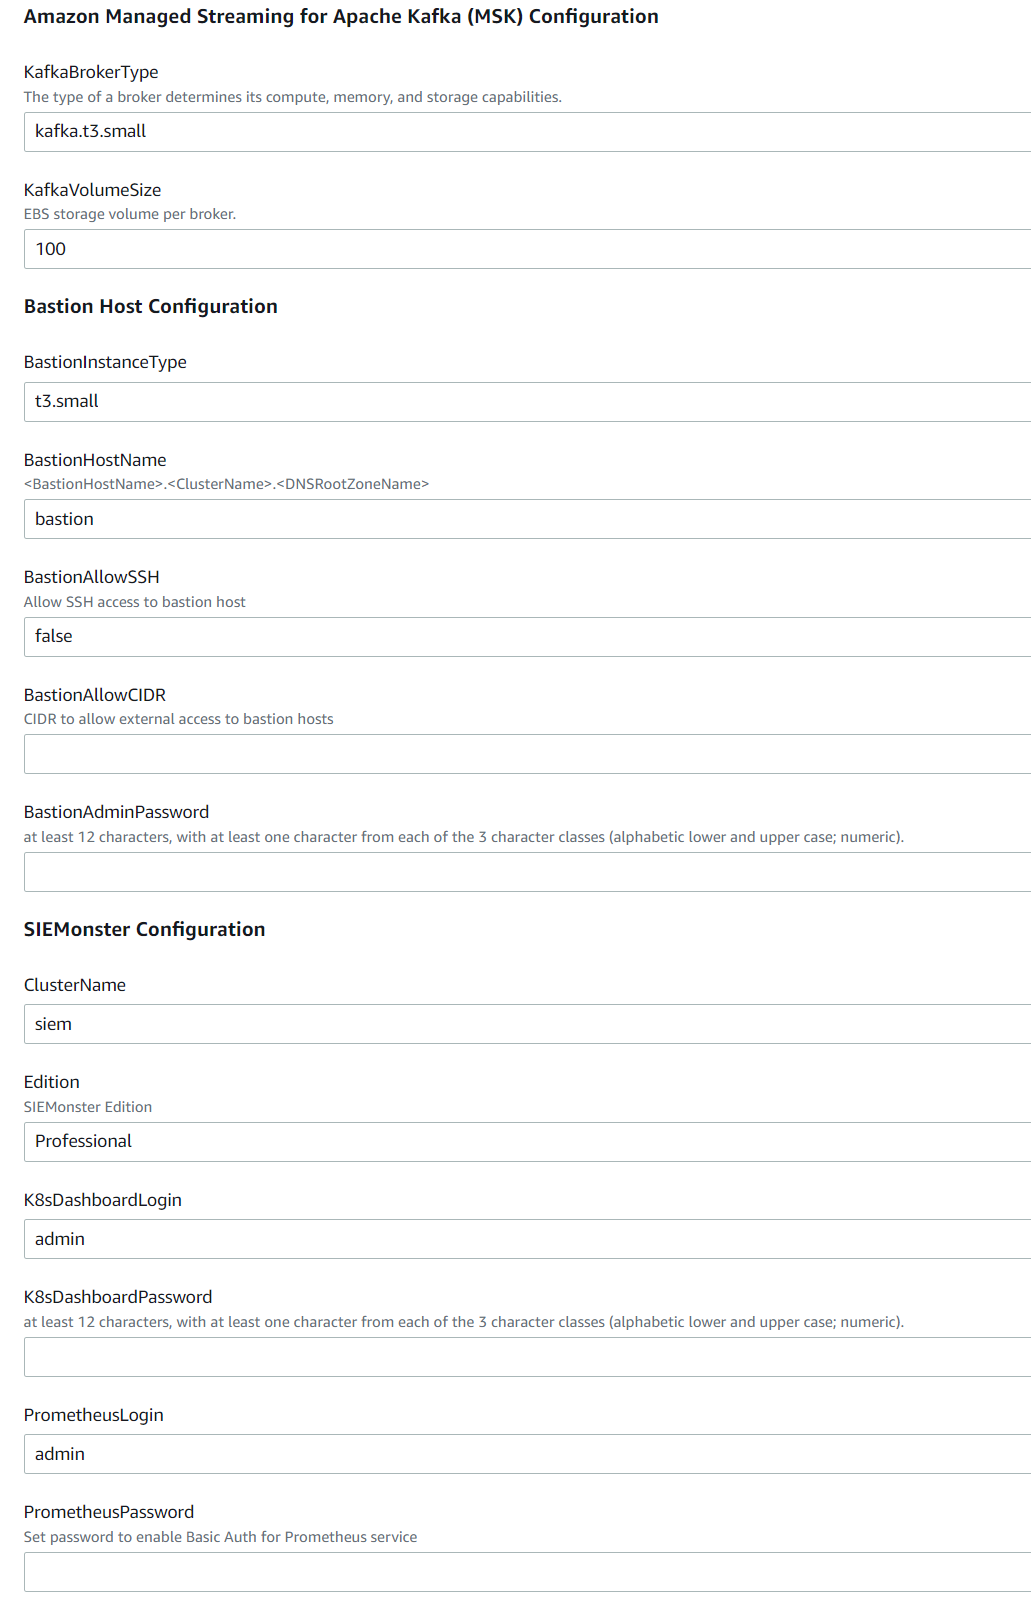
Give your Stack a name and configure the blank details as appropriate for your environment. Ensure you make note of the Bastion Admin Password and the K8s (Kubernetes) Dashboard password entered.
Specify the User ARN who will be interfacing with the Kubernetes backend.
Specify ExistingIgwID and ExistingVpcID if you are deploying to an existing VPC
Choose the required Instance type, (recommended minimum is m5d.2xlarge).
If deploying to existing VPC, enter private and public subnets suitable for your environment as well as the existing VPC CIDR block.
Choose options for OpenSearch depending on expected log volume. If the service-linked role for OpenSearch does not exist, then select ‘true’.
Choose options for Managed Kafka, allowing sufficient volume size for expected message queue retention.
Choose Bastion options for external access and admin password.
Choose a cluster name. This will become part of the access URL, e.g., https://<cluster_name>.<dns_root_zone>
Choose the required SIEMonster Edition required along with passwords for Prometheus and Kubernetes Dashboard access.
Click Next and then Next again adding any tags as required and accept the AWS IAM creation option.
The Stack creation will now begin and will take approximately 30 minutes to complete deployment of all the required infrastructure. A CREATE_COMPLETE status will be shown in the CloudFormation console.
Please allow a further 30-60 minutes for DNS propagation and SIEMonster initialization
Site Access
With the above steps completed, the SIEMonster web application will be available at the public DNS of https://<cluster_name>.<dns_root_zone>.
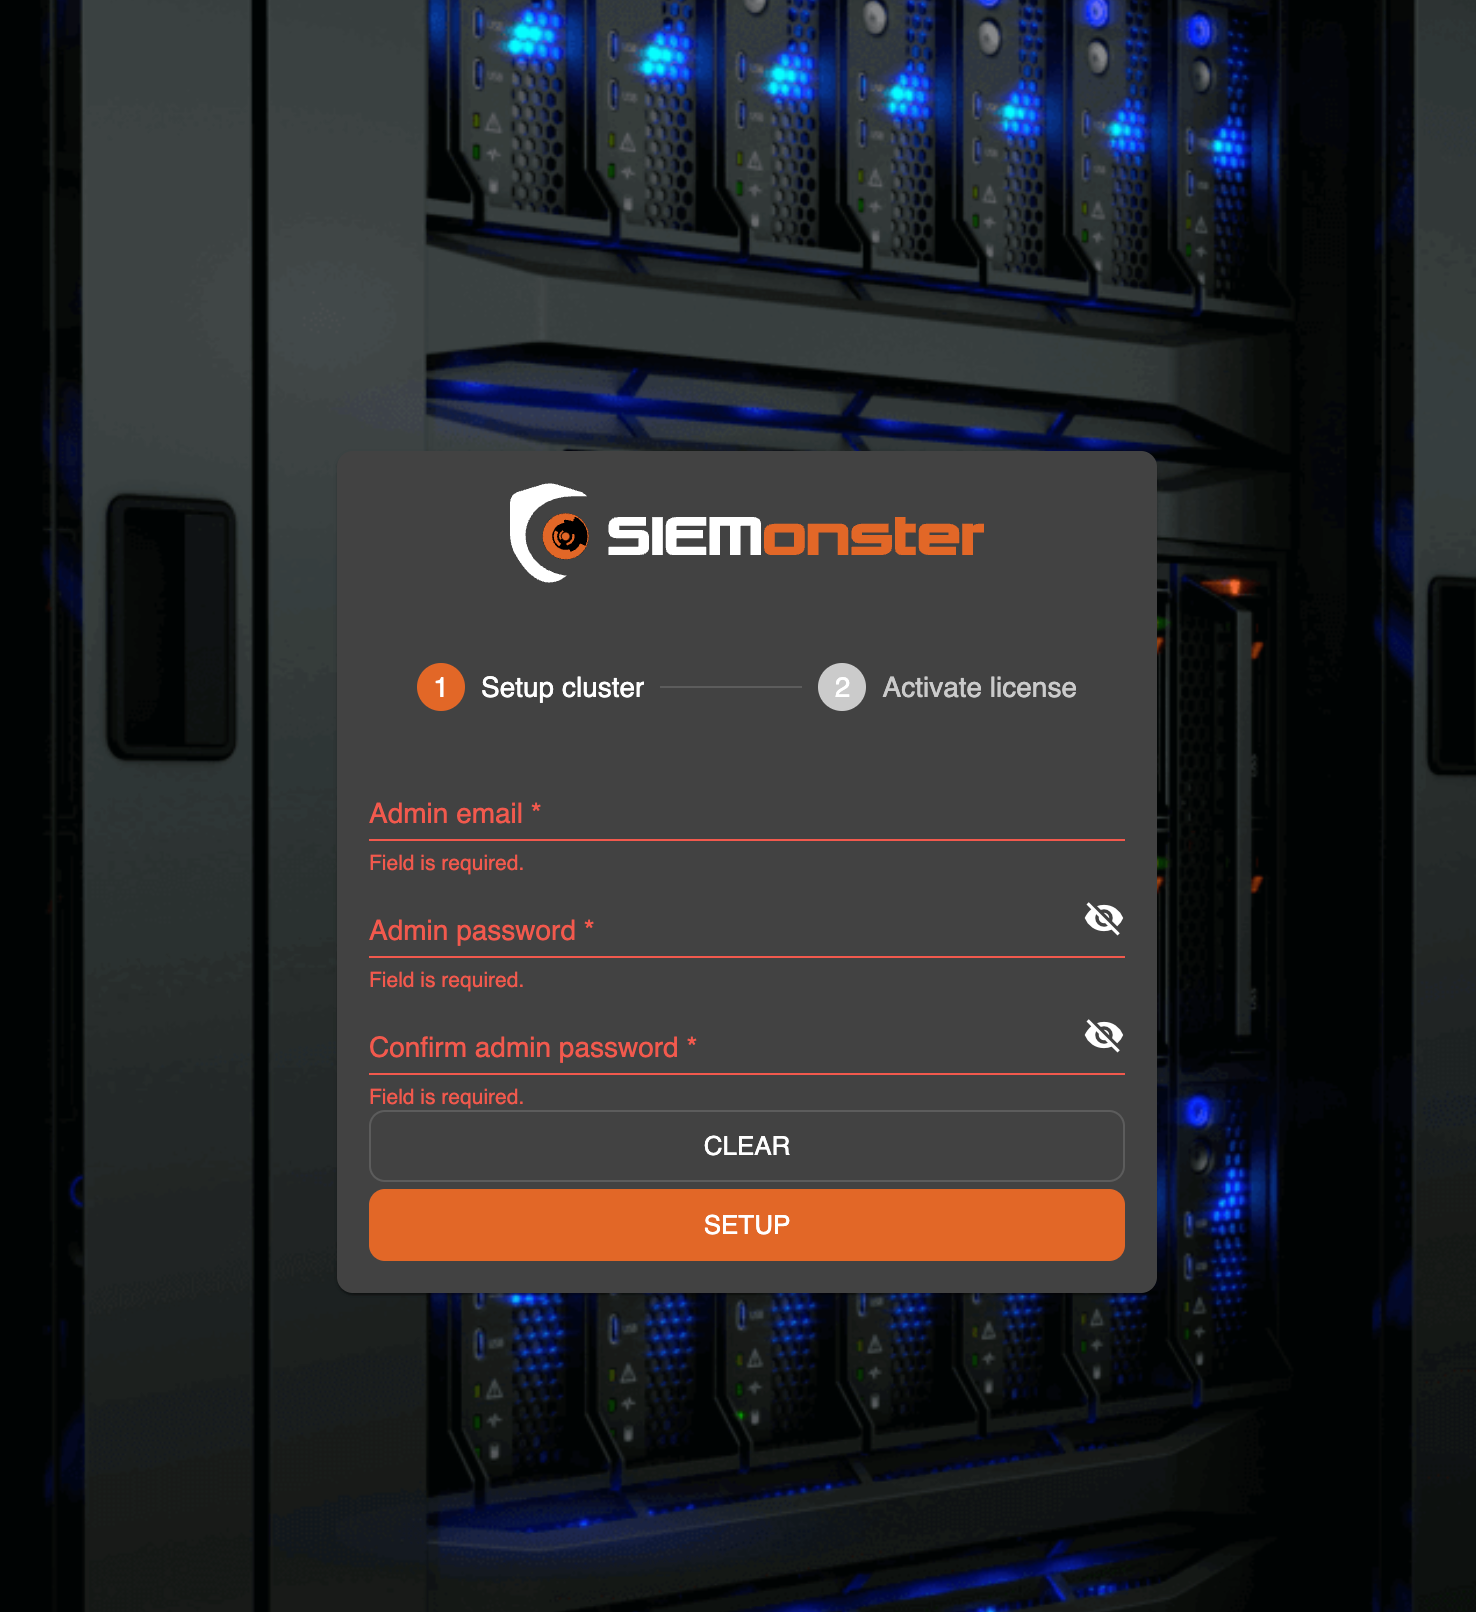
Enter the required administrative user email and password then click the Setup button to proceed to the main console.
Health Check
Another health check that can be performed is by checking Grafana metrics found by going to “System Monitor” in yourur in the top right corneryour user menu in the top right corner:
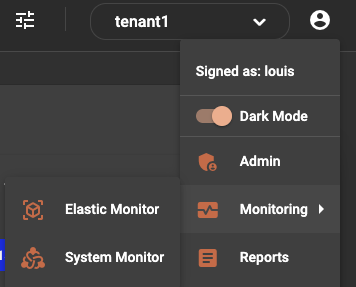
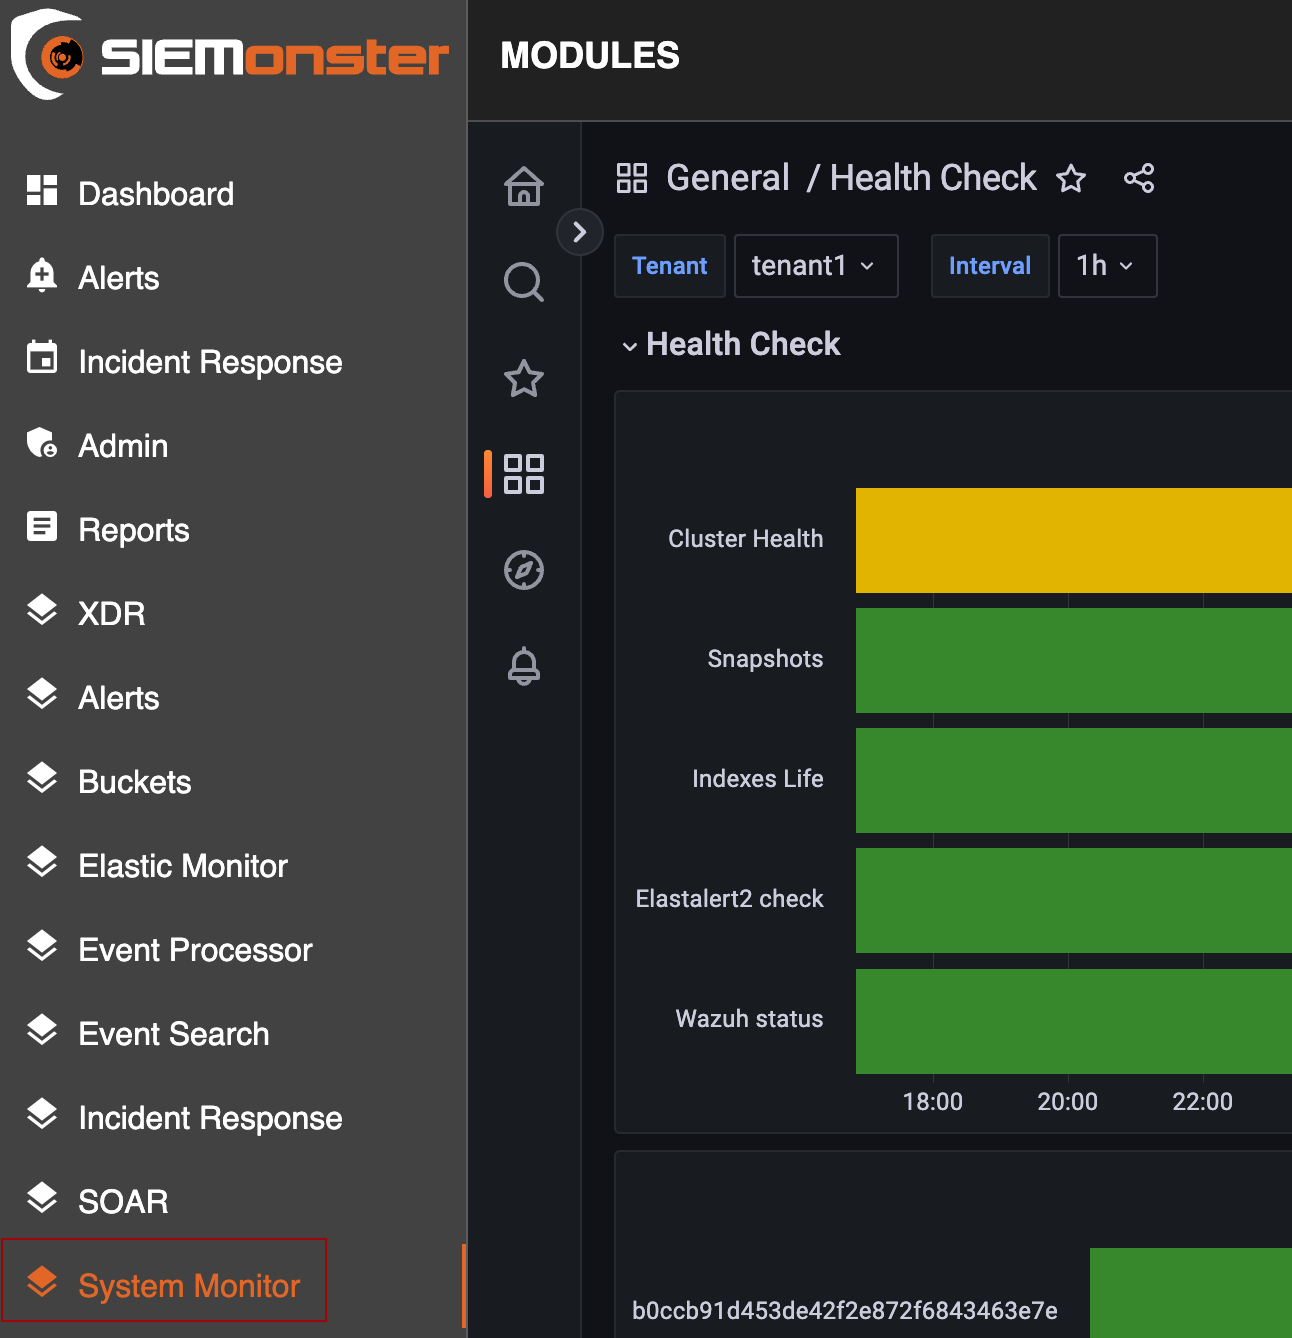
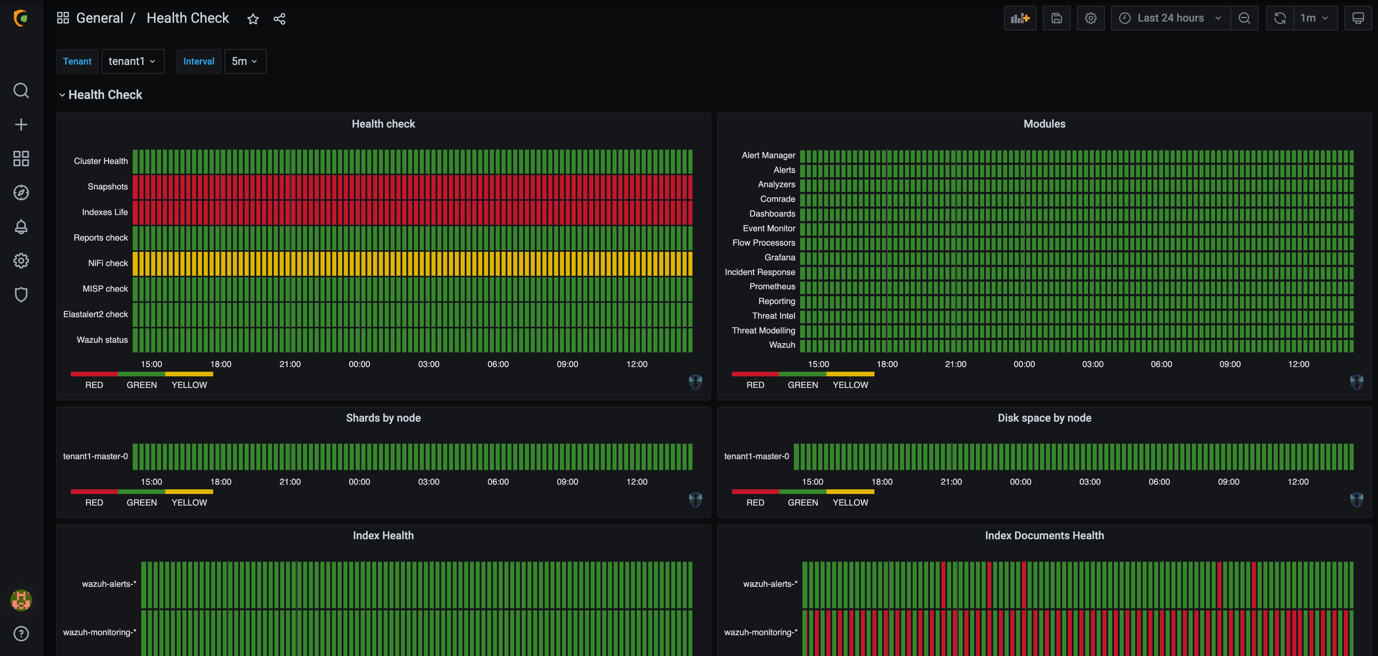
From here you can view the health of many of the backend processes. This also used the Traffic Light Protocol that was mentioned earlier for the dashboard health check.
Service Limits
The following Hyperlinks are provided as a reference to AWS service limits.
Service quotas page https://docs.aws.amazon.com/general/latest/gr/aws-service-information.html
Monitor Service quotas https://docs.aws.amazon.com/AmazonCloudWatch/latest/monitoring/CloudWatch-Quotas-Visualize-Alarms.html
Increase service limits https://docs.aws.amazon.com/general/latest/gr/aws_service_limits.html
Log Ingestion
External log ingestion is handled via a single internet-facing Network Load Balancer. This has an identifiable Tag ‘<cluster_name>-main-lb’ under EC2 – Load Balancers.
There are 2 types of ingestion applications which have preconfigured DNS names:
Wazuh, to accept connections from agents, cluster nodes and via API. TCP ports 1514, 1515,1516 & 55000
wazuh. <cluster_name>.<dns_root_zone>
Nifi, to accept Syslog connections from Firewalls and Endpoint devices. TCP port 5514
nifi. <cluster_name>.<dns_root_zone>
See the respective administration guide for details on configuring endpoint agents and syslog feeds.
Kubernetes Interaction
To interact with Kubernetes via CLI the following steps are required:
Download the latest version of kubectl
Install the latest version of AWS CLI version 2
Ensure that your local AWS profile is set to the of the USER ARN defined in the CloudFormation Template. If using the QuickStart template, the USER/ROLE ARN will be that of the logged in user/role deploying the CF template.
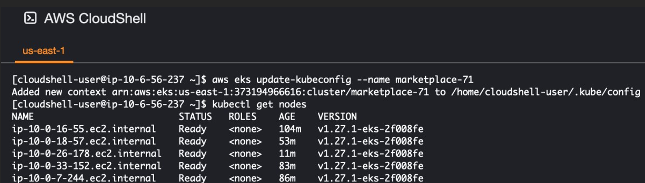
Use the following command to update your local kubeconfig
aws eks --region <my-region> update-kubeconfig --name <cluster-name>
For example: aws eks --region ap-southeast-2 update-kubeconfig --name siem-1992The K8s namespace is <cluster_name>. Using kubectl, interact as follows:
kubectl -n <clu<cluster_name> get pods
Similarly, AWS Cloudshell may also be used provided that it is activated in the same AWS account deploying the solution.
Software Patching
SIEMonster server patch management
From the SIEMonster server shell type
apt-mark hold docker-ce kubelet kubeadm kubectl <Enter>
apt install unattended-upgrades <Enter>
dpkg-reconfigure unattended-upgrades <Enter>
This requires a manual run for the first time
unattended-upgrade <Enter>
Your system is now configured for automatic updates. If you prefer to patch manually the SIEMonster server is built on AWS Linux 2 and instructions found here. https://docs.aws.amazon.com/AWSEC2/latest/UserGuide/al2-live-patching.html
Hydra patch management
For compliance, patch management is required on the Hydra. The solution has been designed with this in mind. Please follow the guidelines below. This will allow you to update the Hydra with all relevant security patches as required.
From the Hydra shell type
apt list --installed |grep docker <Enter>
apt-mark hold docker-ce <Enter>
Now configure automatic security updates
apt install unattended-upgrades <Enter>
dpkg-reconfigure unattended-upgrades <Enter>
This requires a manual run for the first time
unattended-upgrade <Enter>
Your system is now configured for automatic updates.
If you prefer to patch the Hydra box manually it is a Ubuntu Linux Box and patching can be applied as per Ubuntu tutorials https://ubuntu.com/tutorials/upgrading-ubuntu-desktop#1-before-you-start
Topographical Details
Kubernetes Dashboard Access & SSH Key
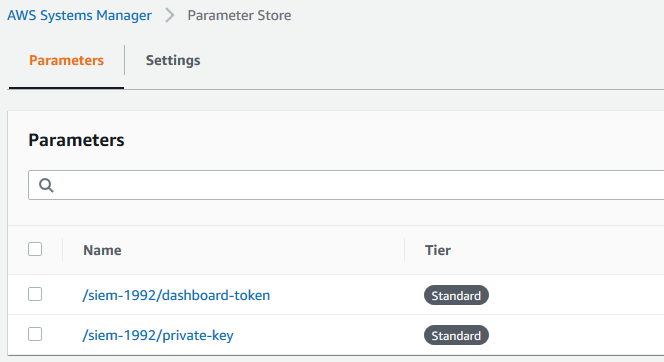
The token required for access to the Kubernetes Dashboard as well as the SSH private key for SSH access to the Bastion and the EKS worker node(s) can be found in the Parameters section under AWS Systems Manager, identified by the Cluster name:
K8s Dashboard is available at the public DNS https://infrastructure-dashboard. Username is ‘admin’ if using the Quickstart template.
<cluster_name>.<dns_root_zone
For example:
https://infrastructure-dashboard.siem-1992.siemonster.io
On first access enter the 12-character Service password defined in the CloudFormation template.
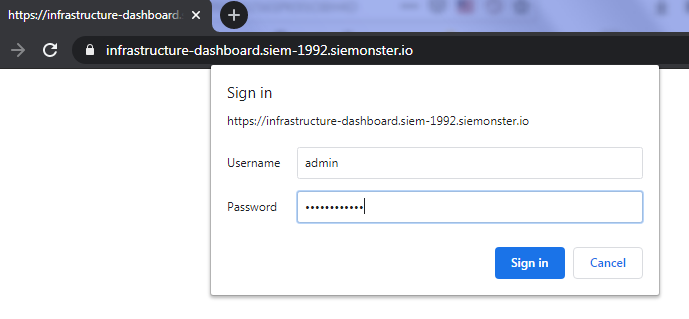
Next, enter the token from Systems Manager/Parameters and click on Sign In
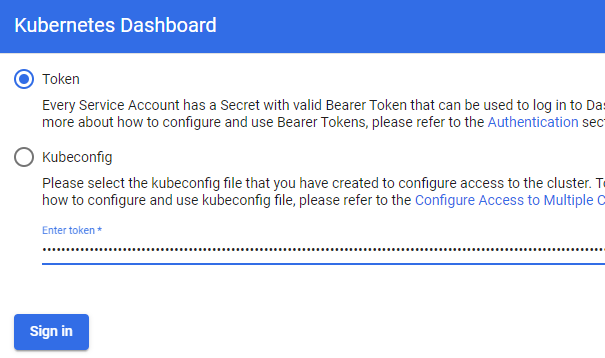

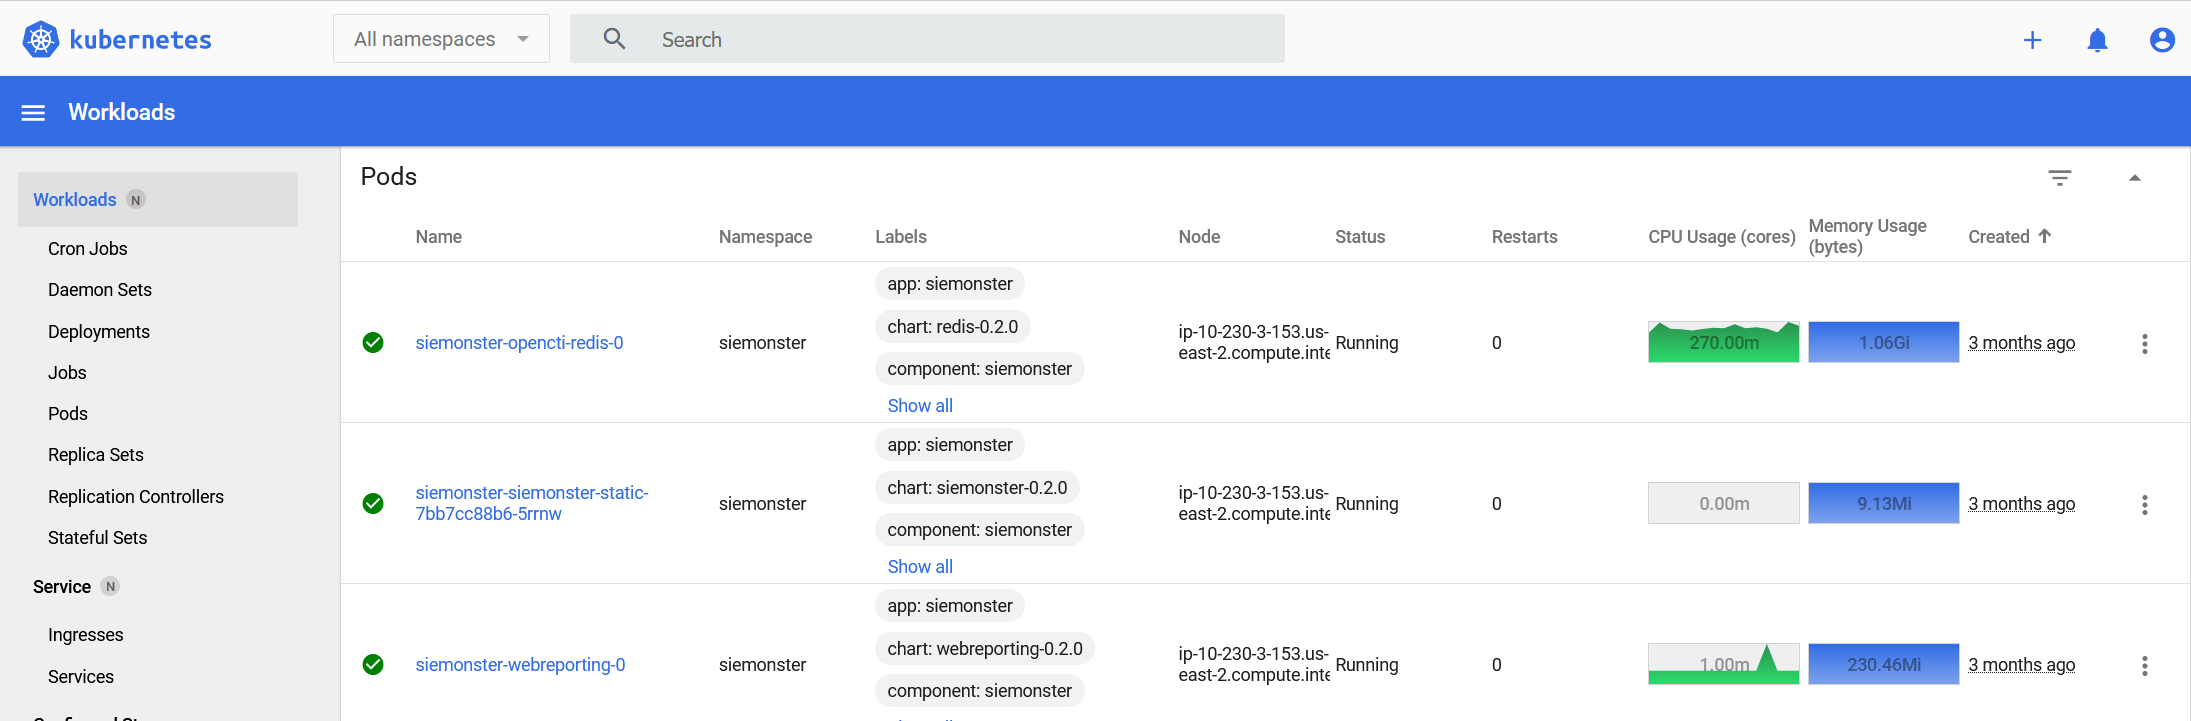
View all utilized Kubernetes resources.
User Data & Stored Credentials
Stored secrets for database credentials are stored in AWS Secrets Manager for the Kubernetes namespace <cluster-name> chosen during deployment. These secrets can be maintained using standard Kubernetes procedures, see https://kubernetes.io/docs/concepts/configuration/secret/, and further information can be found in the AWS resources
https://aws.amazon.com/blogs/containers/aws-secrets-controller-poc/, https://docs.aws.amazon.com/secretsmanager/latest/userguide/integrating_csi_driver.html
A schedule can be set up to rotate these secrets every 90 days by editing the relevant secret ‘Rotation Configuration’ and initiating a 90-day cycle as appropriate with a Lambda Function.
https://docs.aws.amazon.com/secretsmanager/latest/userguide/rotating-secrets.html, https://docs.aws.amazon.com/secretsmanager/latest/userguide/rotate-secrets_turn-on-for-other.html
Stored secrets for SSH certificates and Kubernetes Dashboard tokens are stored with AWS Systems Manager – Parameters.
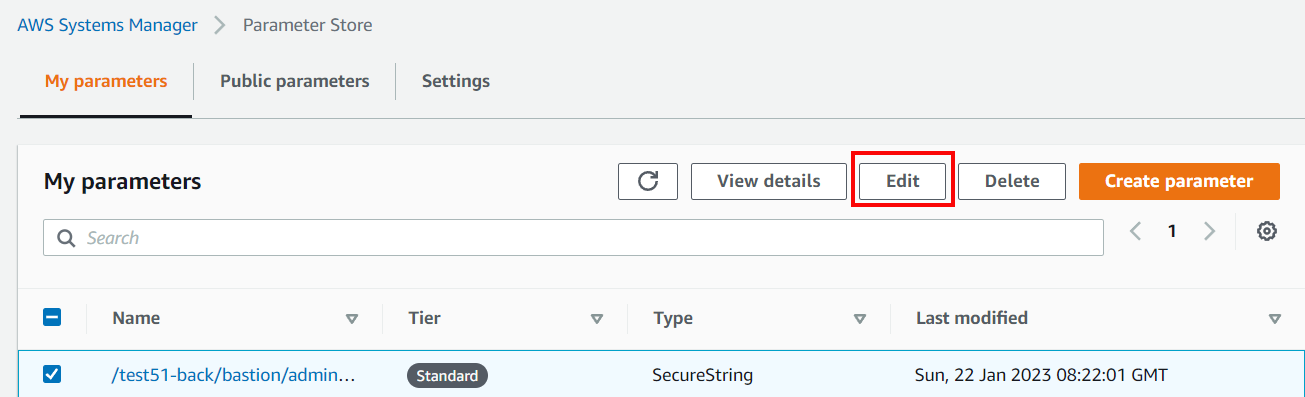
Steps to rotate Parameter Store secrets
Within AWS Systems Manager, Parameter Store, highlight the relevant secret with a prefix equal to the deployed <cluster_name> and click on Edit.
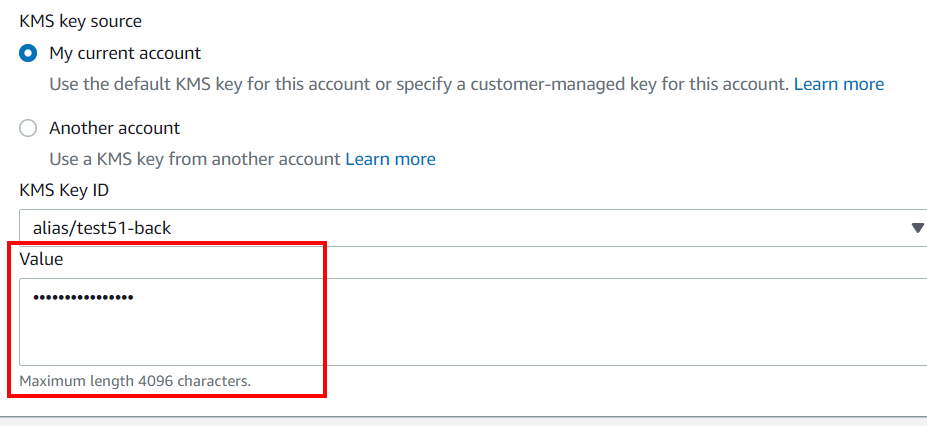
Replace the existing secret by pasting the new value.
Personally Identifiable Information (PII) is restricted to first name, last name & email address of users stored in a database using AES256-CBC encryption. The EC2 volume hosting this database is encrypted at rest using KMS AWS managed keys.
The following storage systems will be deployed utilizing encryption at rest:
Private S3 Buckets
EBS volumes include root volumes
EFS file systems
OpenSearch data volumes & node to node data in transit encryption using TLSv1.2
AWS SDK version provided with the solution uses IMDSv2 by default.
The customer is provided the ability to disable Metadata Service Version 1 (IMDSv1) using the standard aws ec2 modify-instance-metadata-options calls. https://docs.aws.amazon.com/AWSEC2/latest/UserGuide/configuring-instance-metadata-options.html
The encryption configuration KMS uses the following AWS managed keys with automatic annual rotation,
aws/elasticfilesystem
aws/sns
aws/lambda
aws/kafka
aws/s3
aws/ebs
aws/es
aws/ssm
KMS Customer-managed keys are used for deployment configured with automatic annual rotation.identifiable by alias name equal to the deployed cluster name. If you prefer to change the schedule of your keys you can change them manually at the following AWS URL https://aws.amazon.com/premiumsupport/knowledge-center/rotate-keys-customer-managed-kms/
Backup/Restore
Velero backups should be scheduled as per https://velero.io/docs/v1.8/backup-reference/
It is recommended to backup daily and to use an AWS Lifecycle strategy to either expire objects older than 7 days or to transition them to a less expensive storage class. See https://docs.aws.amazon.com/AmazonS3/latest/userguide/object-lifecycle-mgmt.html
The Velero backup includes all persistent volumes and data within the deployment except for OpenSearch, which relies on AWS automated snapshots for cluster recovery.
https://docs.aws.amazon.com/opensearch-service/latest/developerguide/managedomains-snapshots.html
It is recommended to configure OpenSearch daily index snapshots in addition to allow for granular data restoration as and when required. This is covered in more depth in the SIEMonster Documentation.
Additionally, the AWS EFS component can be added to a Backup Plan. This file system is identified by the Name tag being the <cluster_name>. After the File system details page is displayed in https://console.aws.amazon.com/efs/
Under General, choose Edit.
To enable automatic backups, select Enable automatic backups.
Choose Save changes. Reference: https://docs.aws.amazon.com/efs/latest/ug/awsbackup.html
During deployment an S3 bucket was created for the purpose of exporting and importing all cluster data. The bucket will have the prefix ‘velero’ and is used in conjunction with the preconfigured Velero K8s plugin. Example:

To back up the entire cluster follow these steps:
Install the current Velero client
Locate the preconfigured S3 Bucket location
velero -n kube-system backup-location get
Example response:
NAME PROVIDER BUCKET/PREFIX ACCESS MODE
aws aws velero-c2f7d5b0 ReadWrite
Create a snapshot location
velero -n kube-system snapshot-location create ebs-us-east-1 \
--provider aws \
--config region=us-east-1
Adjust region and name to suit
Perform full cluster backup
velero -n kube-system backup create full-cluster-backup \
--snapshot-volumes=true \
--provider aws
Check backup status
velero -n kube-system backup describe full-cluster-backup
To restore a full cluster backup:
When upgrading, identify the unique S3 bucket from the previous system backup, otherwise:
velero -n kube-system backup-location get
When upgrading, identify the snapshot location of the previous system backup, otherwise:
velero -n kube-system snapshot-location
Identify backup:
velero -n kube-system backup get
Restore backup:
velero -n kube-system restore create --from-backup full-cluster-backup
For PersistentVolumeClaims & PersistentVolumes only:
velero -n kube-system restore create --from-backup full-cluster-backup \
--include-resources persistentvolumeclaims,persistentvolumes
Check Restore status
velero -n kube-system restore describe full-cluster-backup
Check velero -n kube-system –help for additional options.
Support
For SIEMonster deployment and any ongoing maintenance, please reach out via the support portal or docs.siemonster.com for free support. Please allow up to 24 hours for a response. You can also reach out to AWS Support for further information on AWS specific support.
For 24/7 support and a dedicated support from our Professional services team, contact our SIEMonster sales team with any enquiries. SIEMonster offer 2,5- or 10-hour support packages per month.
Appendices
Rotating cryptographic Keys
Rotating programmatic system credentials and cryptographic keys - System Credentials
Within the SIEMonster Kubernetes environment, system credentials are maintained as secrets and can be rotated as follows:
Ensure Section 2.7 Kubernetes Interaction has been set up
List secrets for tenancy
kubectl -n <tenant-name> get secrets

Edit Module requiring credential rotation
kubectl -n tenant1 edit secret tenant1-misp
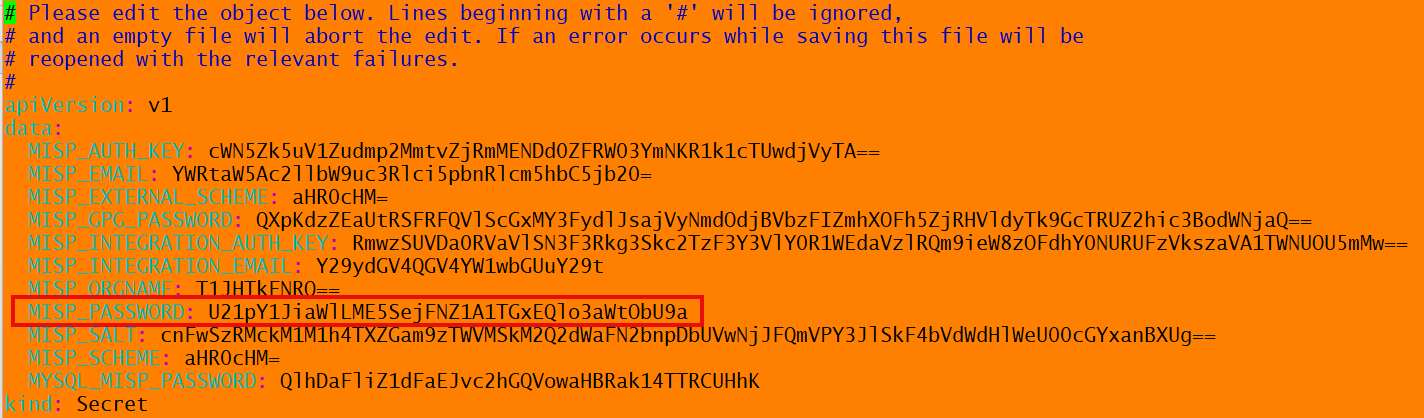
Credentials are Base64 encoded, encode new credential to comply, e.g.
echo -n 'New _Credential' | base64
Replace existing with newly encoded credential, save state and then exit.

Restart chosen module for credential changes to be updated, e.g.,
kubectl -n tenant1 delete pod tenant1-misp-0
Update Auto-Login function in Admin Panel – Roles – admin - <Module Name> - Settings with new credential, e.g.


Click on Save. Module credential rotation is now complete. Cryptographic keys are preconfigured for automatic rotation, see https://docs.aws.amazon.com/kms/latest/developerguide/viewing-keys-console.html
The relevant keys can be identified by the alias which will match the deployed cluster name.
AWS programmatic access key rotation for IAM user reference:
https://docs.aws.amazon.com/IAM/latest/UserGuide/id_credentials_access-keys.html
Handling Fault Conditions
Troubleshooting steps for typical fault conditions within the environment.
Inaccessible Web Interface
Verify target URL is correct – Section 2.4 Site Access
Verify that the CloudFormation deployment has completed successfully.
On error, find solution from first failed event, e.g., ‘Chosen hosted domain not found’. Rectify issue, delete stack and re-deploy.
Verify Kubernetes infrastructure in a healthy state
On pending or error conditions ensure at least 30 minutes has elapsed since deployment for stabilization. Refer to https://docs.siemonster.com for further information.
View Kubernetes event logs using ‘kubectl’
kubectl get events -A
Check for warnings/errors and refer to https://docs.siemonster.com
Inaccessible Modules
Modules in a ‘Yellow’ or ‘Red’ state – see Section 2.5 Health Check, may prevent access.

To troubleshoot, obtain the recent logs for the affected Module and refer to https://docs.siemonster.com for further information.

Log ingestion
When viewing the Dashboards – Discovery window, no current logs are available.
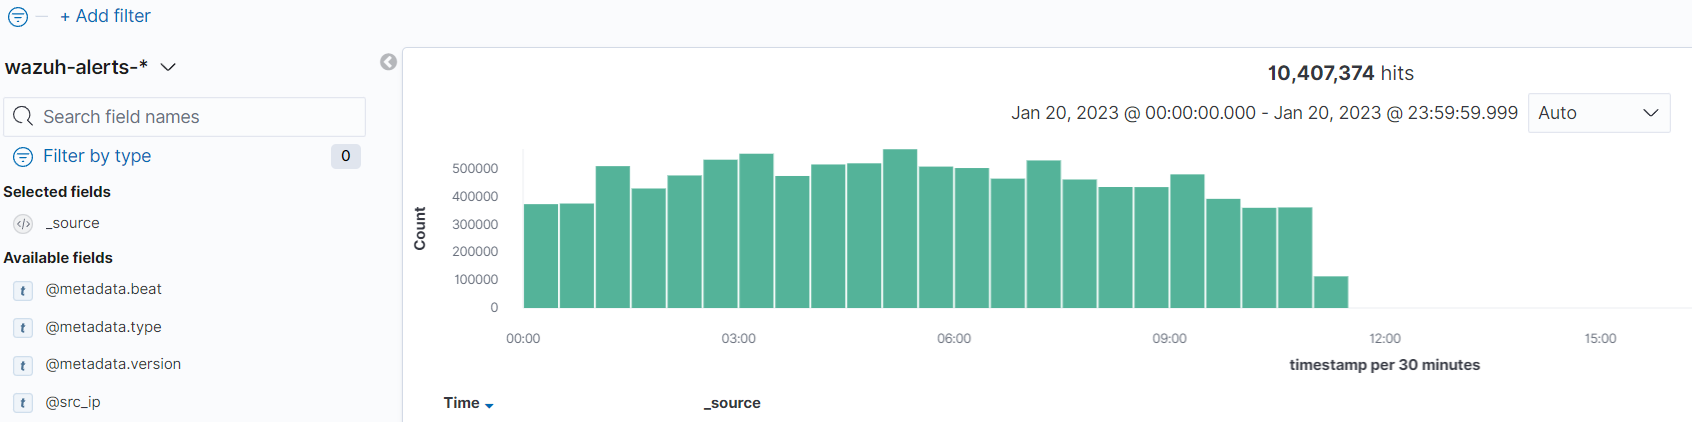
Troubleshooting steps for log ingestion pipelines:
Check OpenSearch Cluster status - https://aws.amazon.com/premiumsupport/knowledge-center/opensearch-red-yellow-status/
Check MSK Status - https://docs.aws.amazon.com/msk/latest/developerguide/troubleshooting.html
Check Flow Processors Module for errors:
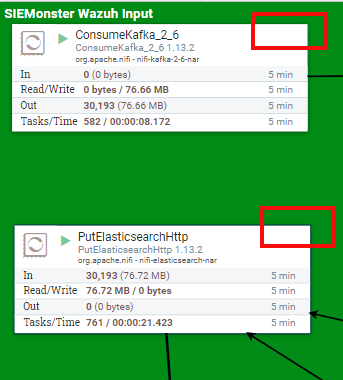
Red bulletins with hover over will indicate errors, see https://docs.siemonster.com/current/log-processors
for potential solutions.
Check AWS Load Balancer Target Groups health status with prefix <tenant-name>wazuh/nifi
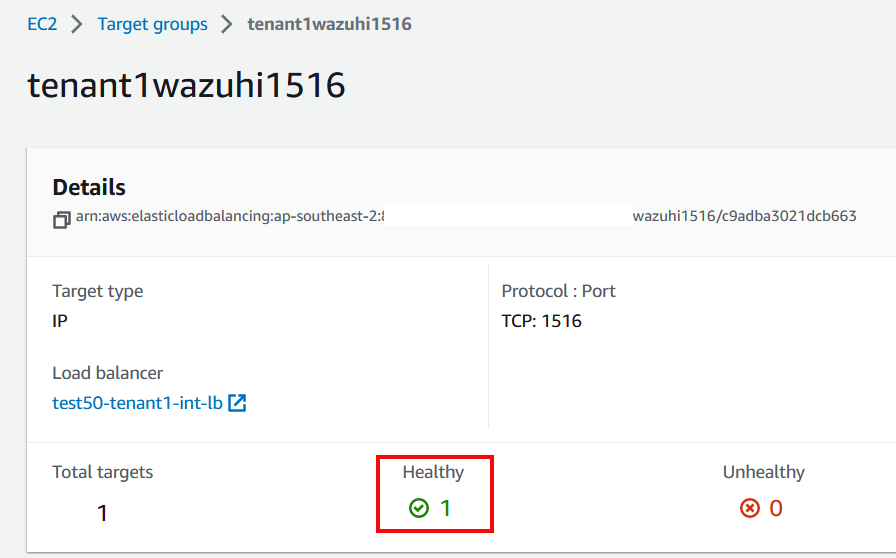
On Unhealthy state verify target instance health - https://docs.aws.amazon.com/AWSEC2/latest/UserGuide/monitoring-system-instance-status-check.html
Agent connections – Verify correct agent setup, see https://docs.siemonster.com/current/wazuh-agent-management
Kubernetes
Details of Kubernetes troubleshooting may be found at https://docs.siemonster.com/current/kubernetes and at https://docs.aws.amazon.com/eks/latest/userguide/troubleshooting.html
Public Resource Exposure
Load Balancers
Application Load Balancer, identified by ‘<cluster_name>-main-alb’
Port exposed – TCP 443
Purpose – Web Application Endpoint
Additions – Configurable WAF option pre-deployment
https://docs.aws.amazon.com/waf/latest/developerguide/getting-started.html
Network Load Balancer, identified by ‘<cluster_name>-main-lb’
Purpose – SSH, VPN, Data Ingestion, Bastion URL
Ports exposed:
SSH TCP 22, access restriction included as a configuration option. Bastion SSH access.
TCP port range 1514-1516 – Data ingestion, access restriction - manual post deployment
VPN UDP 1194 – VPN link, access restriction - manual post deployment
TCP 8443 – Bastion URL identified by https://bastion.<cluster_name>.<dns_root_zone>:8443 access restriction - manual post deployment
Refer to https://docs.aws.amazon.com/AWSEC2/latest/UserGuide/working-with-security-groups.html for post deployment security group management.
DNS
Publicly exposed Route53 DNS records:
NS – identified by <cluster_name>.<dns_root_zone>
A record identification:
<cluster_name>.<dns_root_zone>
*.<cluster_name>.<dns_root_zone>
bastion. <cluster_name>.<dns_root_zone>
wazuh. <cluster_name>.<dns_root_zone>
inside.wazuh. <cluster_name>.<dns_root_zone>
https://docs.aws.amazon.com/Route53/latest/DeveloperGuide/hosted-zones-working-with.html
Network Configuration
VPC options
Configurable pre-deployment to integrate with existing customer VPC. Default will deploy a new VPC with the following CIDR - 10.0.0.0/16
Subnets
Configurable pre-deployment to integrate with existing customer VPC. Default will deploy a public subnet with CIDR ranges 10.0.0.0/22, 10.0.64.0/22 and private subnets with CIDR ranges 10.0.128.0/22, 10.0.192.0/22
Security Groups
The following security groups are created during deployment:
Internal
<cluster_name>-ClusterNodeBastionIntSg
<cluster_name>-ElasticsearchSecurityGroup
<cluster_name>-NodeSecurityGroup
<cluster_name>-ClusterNodeEfsSg
<cluster_name>-KafkaSg
<cluster_name>-LambdaDeploySecurityGroup
<cluster_name>-ControlPlaneSecurityGroup
External
<cluster_name>-ClusterNodeBastionSg
<cluster_name>-ALBSecurityGroup
Access restrictions configurable pre and post deployment.
https://docs.aws.amazon.com/AWSEC2/latest/UserGuide/working-with-security-groups.html
NACL’s
A Network ACL is created during deployment identified by Tag Key
‘aws:cloudformation:stack-name’ This NACL is associated with all 4 subnets and allows all traffic. For a customer integrated VPC deployment type, the NACL rules will reflect those of the existing VPC. https://docs.aws.amazon.com/vpc/latest/userguide/vpc-network-acls.html
Route Tables
3 route tables are created during deployment, identified by Tag Name ‘<cluster_name>’.
2 route tables identified by Tag Key ‘aws:cloudformation:logical-id’ of ‘ClusterNodePrivateRT1’ route traffic from the private subnets to a NAT gateway.
1 route table identified by Tag Key ‘aws:cloudformation:logical-id’ of ‘ClusterNodePublicRT’ routes traffic to an Internet Gateway
https://docs.aws.amazon.com/vpc/latest/userguide/WorkWithRouteTables.html
Deployment Troubleshooting and Testing
Identifying CloudFormation errors during deployment
Reference - https://docs.aws.amazon.com/AWSCloudFormation/latest/UserGuide/stack-failure-options.html
During stack deployment any errors that occur maybe viewed under Stack Events.
https://docs.aws.amazon.com/AWSCloudFormation/latest/UserGuide/cfn-console-view-stack-data-resources.html
Example:

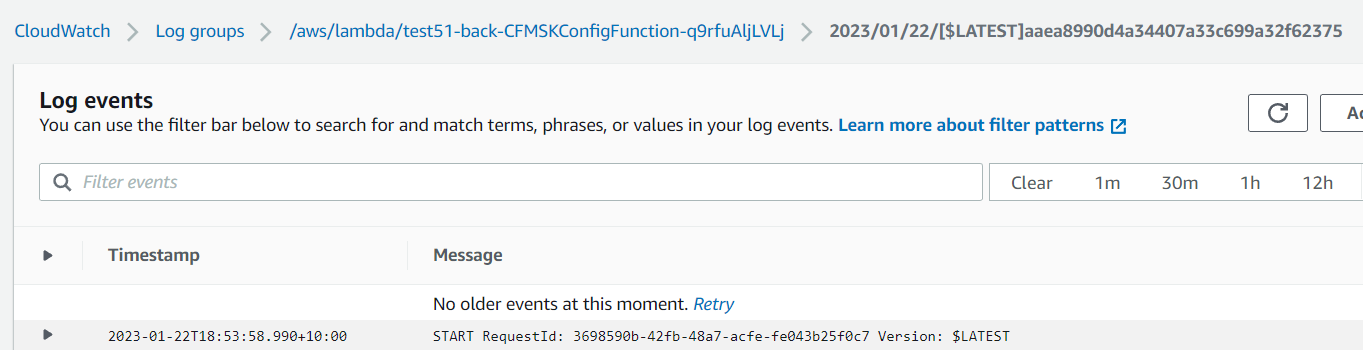
Further information regarding the reason for the failure can be found within Cloudwatch – Log groups.
https://docs.aws.amazon.com/AmazonCloudWatch/latest/logs/Working-with-log-groups-and-streams.html
Relevant entries will contain a prefix of <stack_name> and contain detailed information regarding the deployment process.
Example:
Common causes for failures:
Elastic IP limits
Load Balancer limits
EC2 instance limits
https://docs.aws.amazon.com/AWSEC2/latest/UserGuide/ec2-resource-limits.html
VPC constraints when deploying within existing VPC – check CIDR ranges do not overlap with existing assets https://docs.aws.amazon.com/vpc/latest/userguide/working-with-vpcs.html
DNS
Check that the hosted zone used for deployment exists and is publicly accessible.
https://docs.aws.amazon.com/Route53/latest/DeveloperGuide/hosted-zones-working-with.html
Post deployment testing procedure - checking accessibility of assets defined in Section 4.3