
Index deletion - Deprecated
Published: 12/12/2022
Version: 1.0
Index Management Policy for data removal
The purpose of this section of the document is to provide the relevant information needed configure policies to remove/delete data older than a specific date range. The process is designed to be as simple and intuitive as possible. Please note that this document deals with the permanent deletion of data and should be used cautiously to prevent data loss. Always have backups of your data before starting this process. SIEMonster cannot be held liable for any data loss due to the use of the information contained in this document or the application thereof.
The Process:
1. Define retention period
a. The retention period can be designated on the number of days. The days required is usually government by compliance such as PCIDSS or similar. The most basic strategies are usually referred to as 30, 60, 90 or 180 day retentions. But this can be increased up to a year or more depending on your needs.
2. Modify the supplied policy with the retention period
a. Sample Policy
{
    "policy": {
        "description": "Policy that deletes indices 'Delete-indices-30' older than 30 days",
        "schema_version": 1,
        "error_notification": null,
        "default_state": "open",
        "states": [
            {
                "name": "open",
                "actions": [],
                "transitions": [
                    {
                        "state_name": "delete",
                        "conditions": {
                            "min_index_age": "30d"
                        }
                    }
                ]
            },
            {
                "name": "delete",
                "actions": [
                    {
                        "delete": {}
                    }
                ],
                "transitions": []
            }
        ]
    }
}
b. Go to “Dashboards”, then to “Index Management” and Click “Create policy”
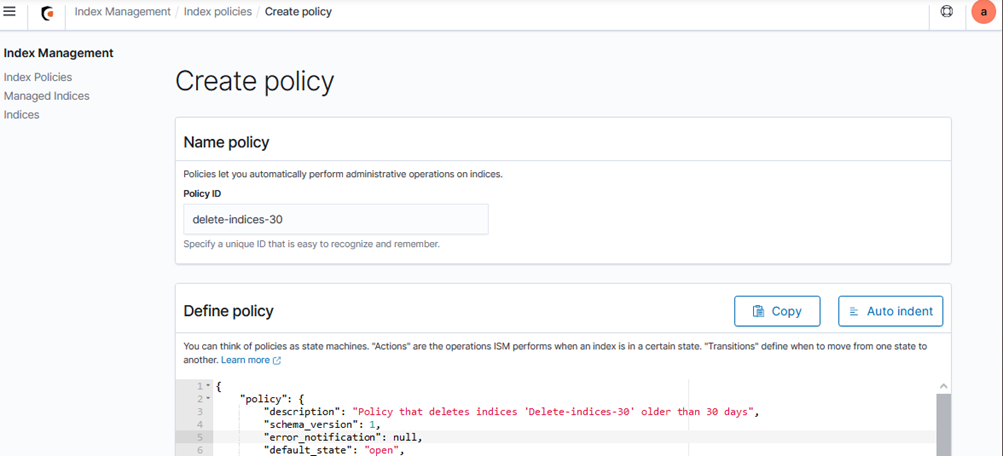
c. Then type a name/policy id for the policy, be descriptive
d. Paste the policy text that has been modified by you into the “Define Policy” box.
e. Click “Create” in the bottom right corner
f. Your policy will now be displayed

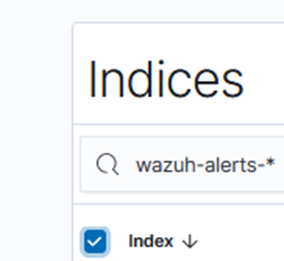
g. Click “Indices” in the left column
h. Type the pattern you would like to apply the policy to e.g. wazuh-alerts-*. This will filter the indices to that specific pattern. If there are many and you want to apply it all of them change the number 20 in the dropdown at the bottom to 50.
Click the selector box next to Index
j. Click “Apply policy” in the top right corner
k. Select your policy from the dropdown
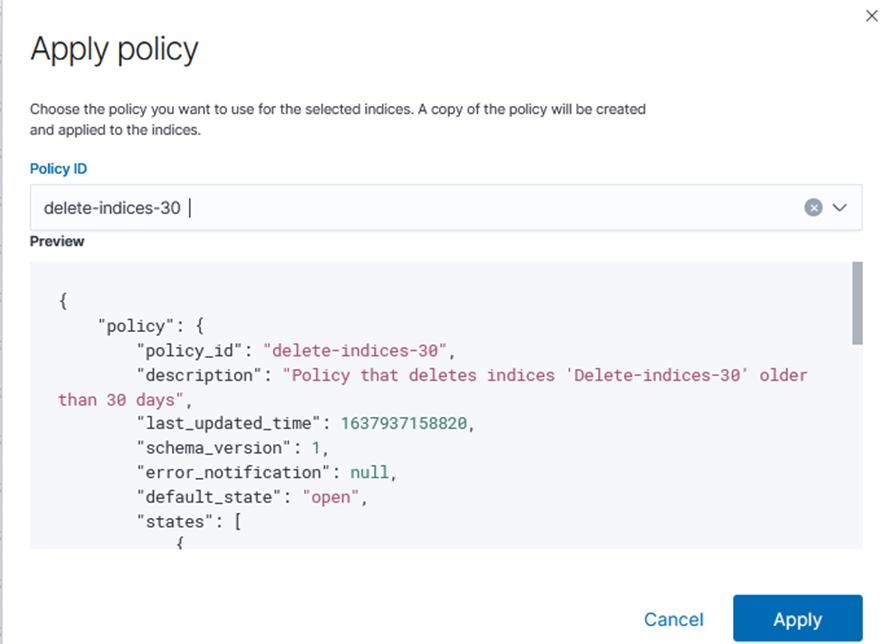
l. Click “Apply”
m. You will see that the “Managed by policy” column now reflects “Yes”

n. Repeat this process until you have applied it to all the indices you want.
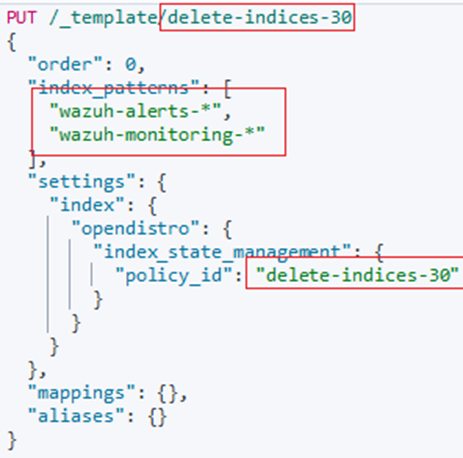
3. To ensure this is applied to all future indices, it is required that a template be created with the information of the indices that will need to be permanently managed as well the policy that will apply. To perform these actions go to Dev tools
a. Paste the example template text from the following url into the Dev tools left column. Modify it to reflect the correct policy name (top most highlighted block), index patterns the policy will be applied to (second block) and policy id (third block) as indicated in the screenshot below. The template name can be anything as long as it makes sense to the administrator
PUT /_template/delete-indices-30
{
  "order": 0,
  "index_patterns": [
    "wazuh-alerts-*",
    "wazuh-monitoring-*"
  ],
  "settings": {
    "index": {
      "opendistro": {
        "index_state_management": {
          "policy_id": "delete-indices-30"
        }
      }
    }
  },
  "mappings": {},
  "aliases": {}
}
b. If successful you will see the following output on the right hand side
Your environment will now automatically remove your old indices.