
Threat intelligence administration
Threat intelligence requires some items to be configured on initial deployment. These are not configured by default due to varying customer requirements and needs. This page will cover the administration related items required to setup your instance and how to check it for health.
Activating feeds:
One of the most important initial tasks is to activate whichever feeds are required, without this, threat intelligence won’t ingest any data and remain dormant.
The following steps will activate the preferred feeds:
Log into your SIEMonster instance
On the left shortcut bar click on the stacked squares, this is the modules section

Now Click on Threat Intelligence
Click on Sync Actions, while hovering Click on List Feeds
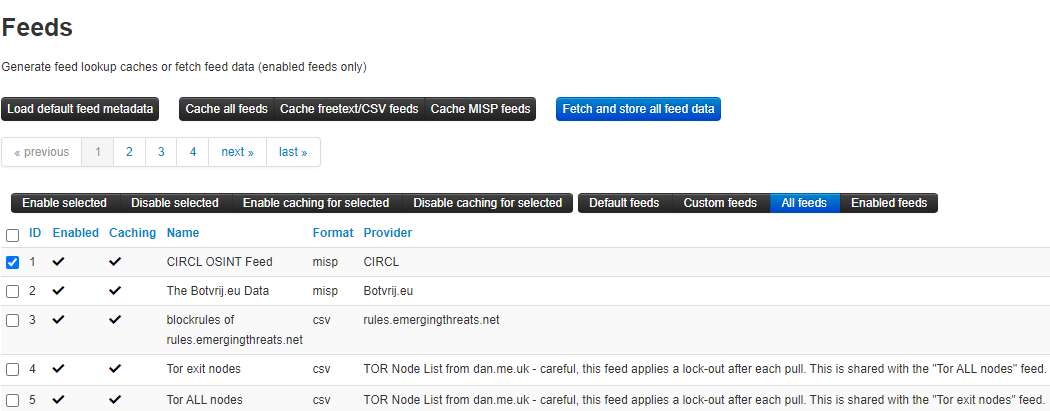
NOTE: If you only have two feeds listed, please Click Load default feed metadata at the top of the page. This will add all the available feeds
In total there will be four or more pages of feed listings
On each page Select the checkboxes next to each feed that you want to enable.
NOTE: Do not move to the next page as it will deselect what you have selected.Once your selection for the current page is complete, Click Enable selected at the top of the page. The page will refresh and go back to the first page of the feeds.
Now reselect the ones you have enabled and Click Enable caching for selected at the top of the page. The page will refresh and go back to the first page of the feeds.

Repeat the above process for each page which has feeds you would like to enable.
Once your selection is complete, Click Fetch and store all feed data at the top of the page

Your feeds page should look similar to the screenshot below with just the preferred feeds having a tick mark in the column for enabled and caching
Checking Jobs
Once the steps in the Activating feeds section is complete, and the Fetch and store all feed data has been clicked, you can check on the progress by reviewing the Jobs page.
To so please follow these steps:
Click on Administration at the top-most part of the screen
Click Jobs
There will be a number of items listed there as per below example. To make it easier to view only current items, Click Completed at the top, this will purge any jobs that have been completed.
⚠️ NOTE: The All option next to completed should only be clicked once all jobs are complete or there is an error in the system.Now Click on the last page listed at the bottom left of the Jobs pane, this will take you to the active jobs and you will also be presented with the queued jobs.
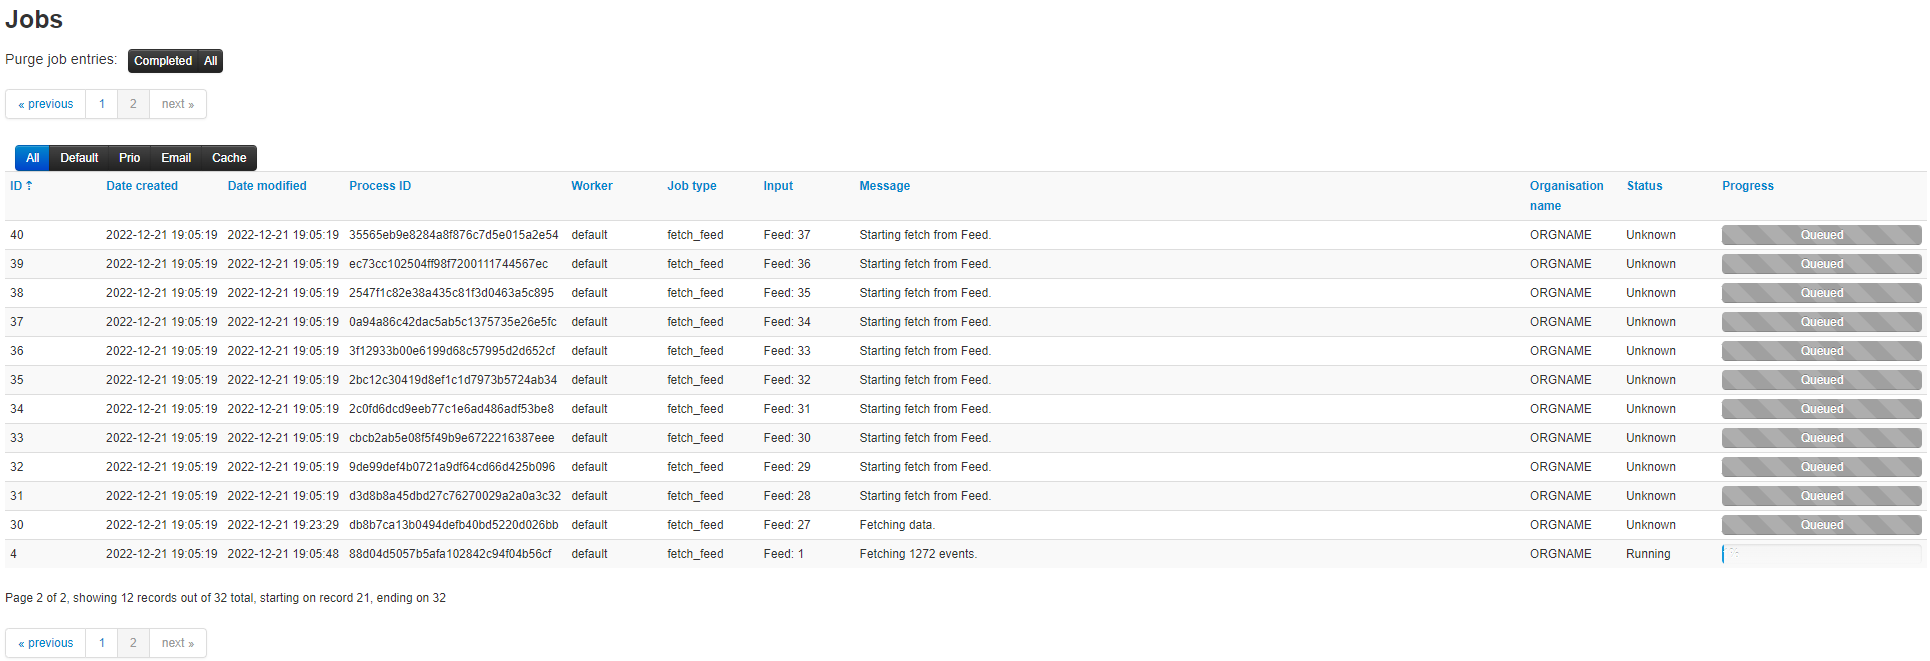
If there are any job lines that have failed, leave them in place until the other remaining items have completed.
NOTE: If there is no progression on the jobs, please proceed to Click the All button and proceed to the section named Server settings and maintenance.
Scheduled Tasks:
For the system to regularly retrieve updates on the activated feeds, a schedule must be added for automation. By default these will be set to zero values and values reflective of your needs can be added.
Please perform the following steps:
To so please follow these steps:
Click on Administration at the top-most part of the screen
Click on Scheduled Tasks, the following will be displayed

Please Click on each 0 in turn and add the frequency in hours you want the jobs to run.
NOTE: Other than for the line that is named fetch_feeds all others should be set to a minimum of weekly.Once completed Click Update All