
Threat Intelligence events
MISP events are encapsulations for contextually linked information. The MISP interface allows the user to have an overview over or to search for events and attributes of events that are already stored in the system in various ways.
On the left pane, click List Events. The Events page opens, that displays a list of last 60 events.
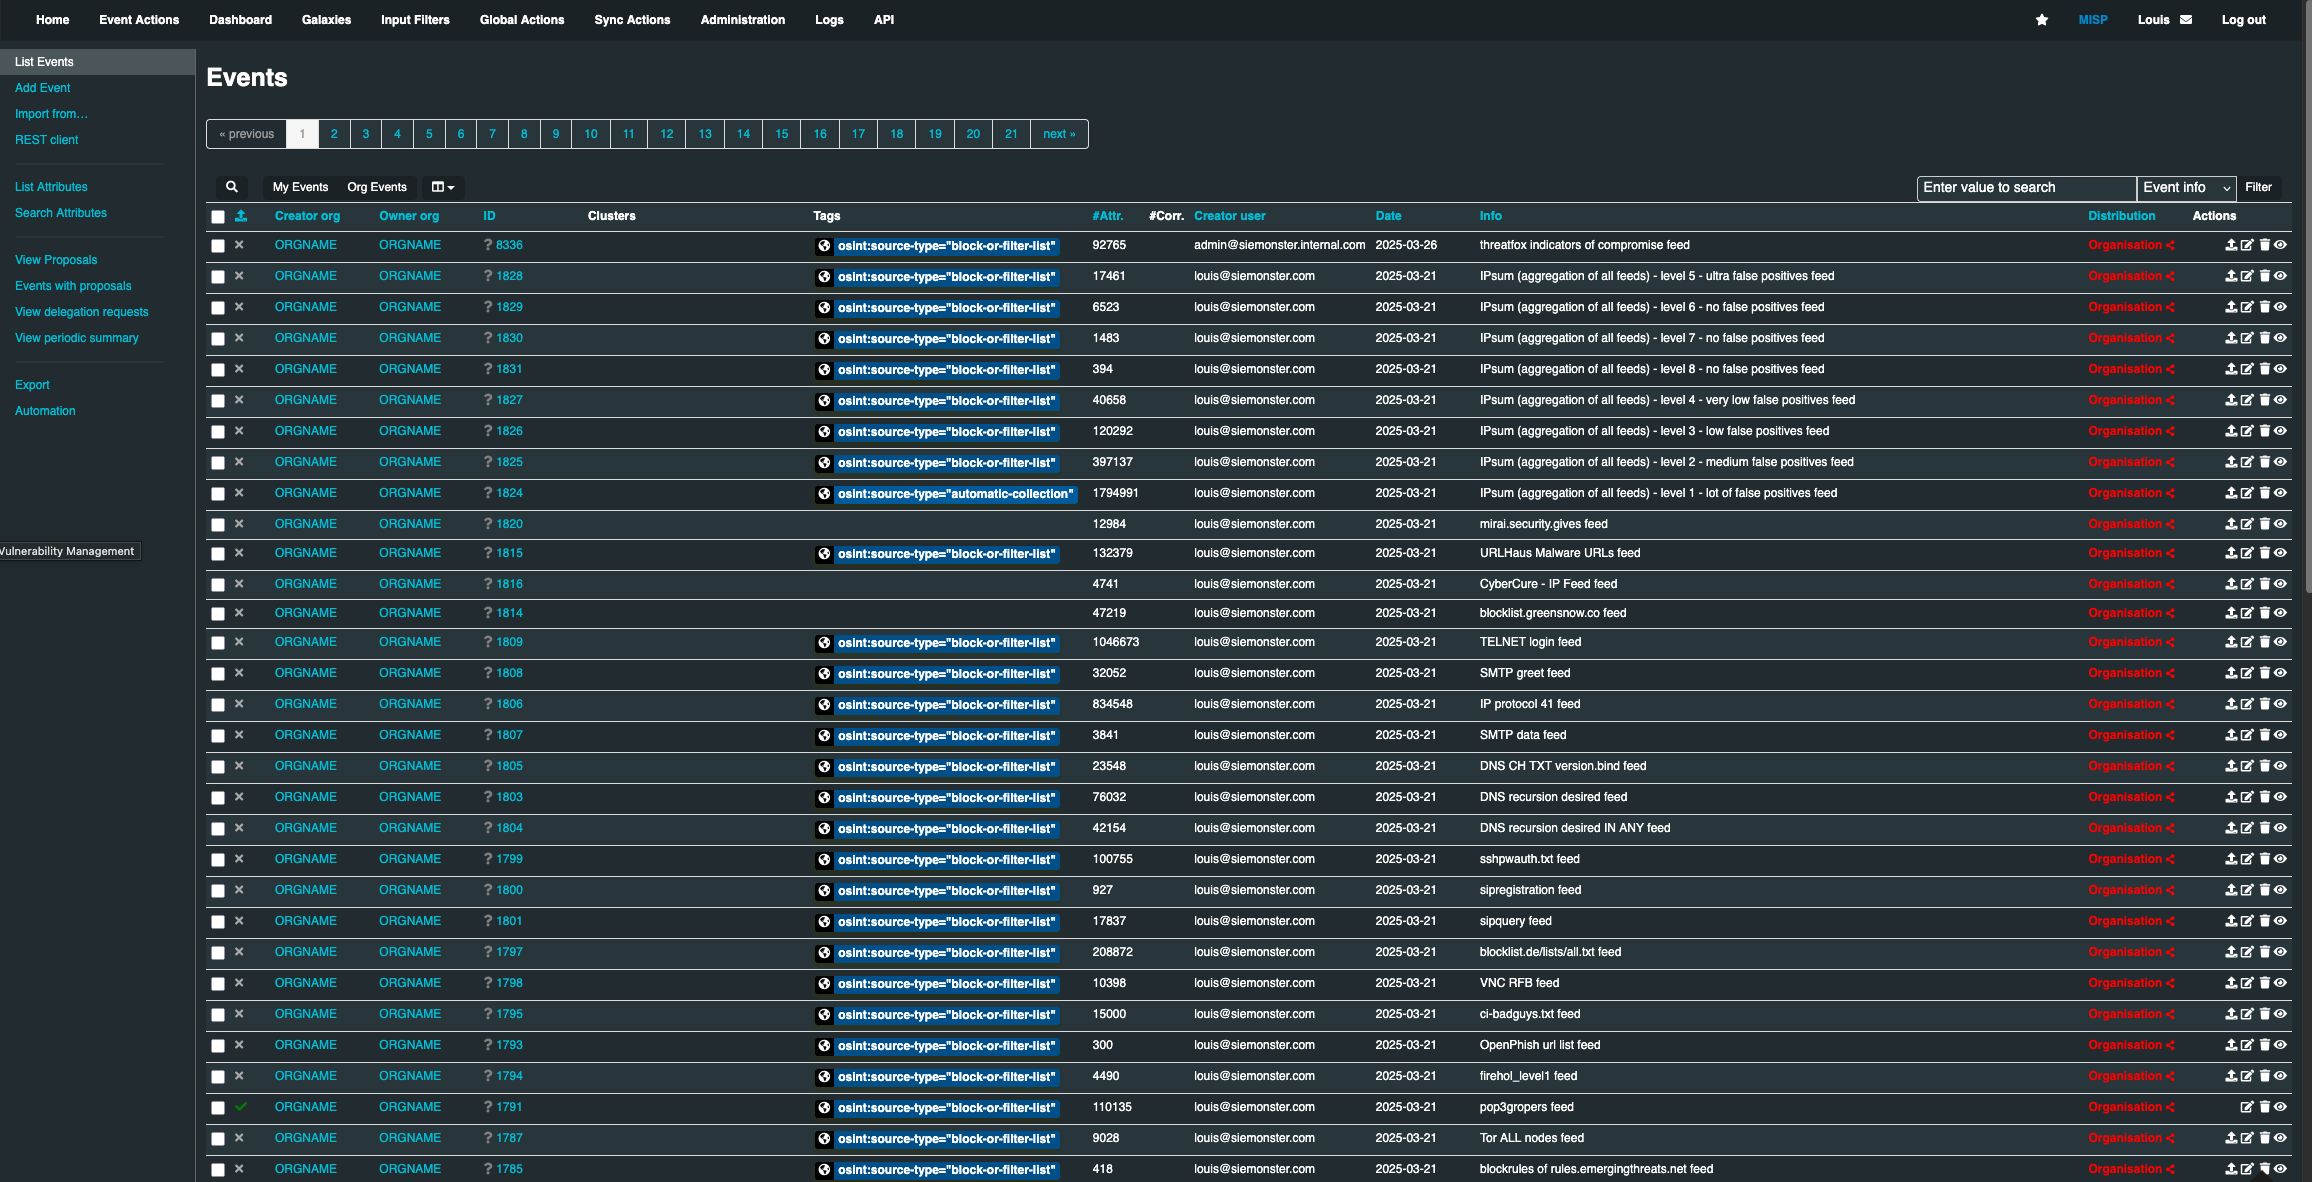
Published: Already published events are marked by a check mark, and the unpublished events are marked by a cross
Org: The organization that created the event
Owner Org: The organization that owns the event on this instance. This field is only visible to administrators
ID: It displays the ID number of the event that was assigned by the system
Tags: Tags that are assigned to this event.
#Attr.: The total number of attributes that the event include
Email: The e-mail address of the event's reporter
Date: The date of the attack
Info: A short description of the event
Distribution: This field describe who has access to the event
Actions: The controls that allows user to either view or modify the event. The Actions available are:
Publish Event
Edit
Delete
View
Adding an events:
The process of adding an event can be split into 3 phases:
The creation of the event itself
Populating it with attributes and attachmen
Publishing it
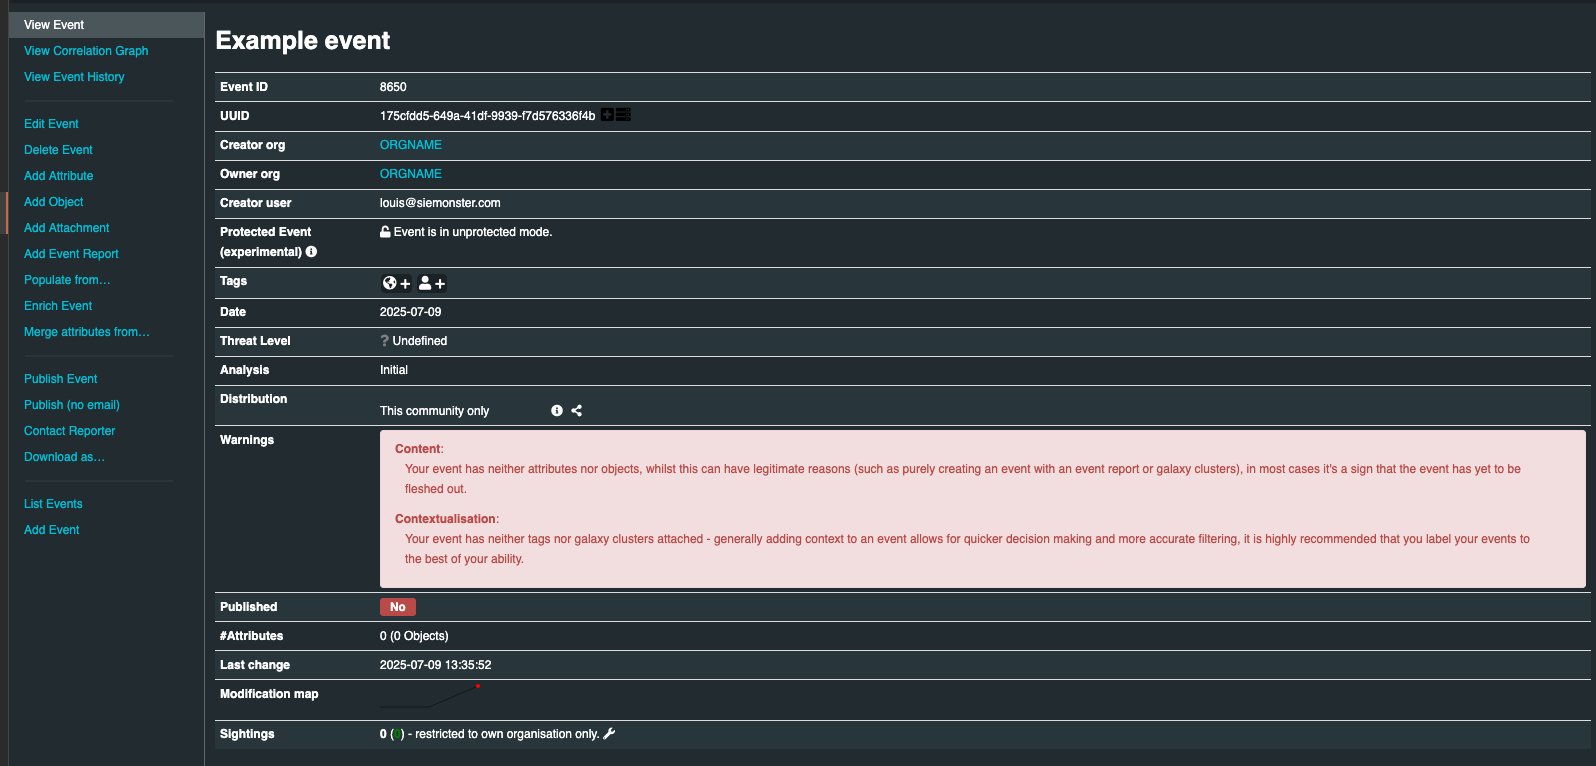
To create the event, click Add Event on the left pane, Add Eventpage opens. During this first step, you will be create a basic event without any actual attributes, but storing general information such as a description, time and risk level of the incident.
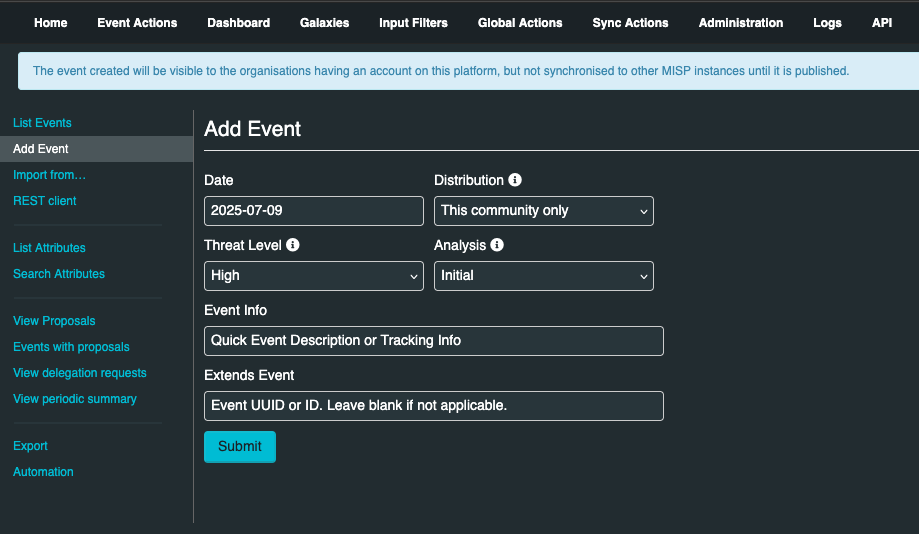
Provide the following data in the Add Event page.
Date: This is the date of the incident
Distribution: It controls the visibility of the event once it is published. Distribution also controls whether the event will be synchronized to other servers or not. The following options are available in the drop-down menu:
Your organization only: This setting will only allow members of your organization to see this event
This Community-only: Users that are part of your MISP community will be able to see this event. This includes your own organization, organizations on the MISP server, and organizations running MISP servers that synchronize with this server
Connected communities: Users that are part of your MISP community will be able to see this event. This includes all organizations on this MISP server, all organizations on MISP servers synchronizing with this server, and the hosting organizations of servers that connect to those afore mentioned servers (so basically any server that is 2 hops away from this one). Any other organizations connected to linked servers that are 2 hops away from this own will be restricted from seeing the event.
All communities: This will share the event with all MISP communities, allowing the event to be freely propagated from one server to the next.
Threat Level: This field indicates the risk level of this event. The following options are available in the drop-down menu:
Low: General mass malware.
Medium: Advanced Persistent Threats (APT)
High: Sophisticated APTs and 0day attacks
Analysis: Indicates the current stage of the analysis for this event, with the following possible options:
Initial: The analysis is just beginning
Ongoing: The analysis is in progress
Completed: The analysis is complete
Event Info: This is where the malware/incident can get a brief description starting with the internal reference.
Adding attributes events:
Once the event is created, the next step is to add attributes. This can be done by adding them manually or importing the attributes from an external format (OpenIOC, ThreatConnect). Click “Add Attribute” on the event screen that you have created to add an attribute.

Keep in mind that the system searches for regular expressions in the value field of all attributes when entered, replacing detected strings within it as set up by the server's administrator (for example to enforce standardized capitalization in paths for event correlation or to bring exact paths to a standardized format).
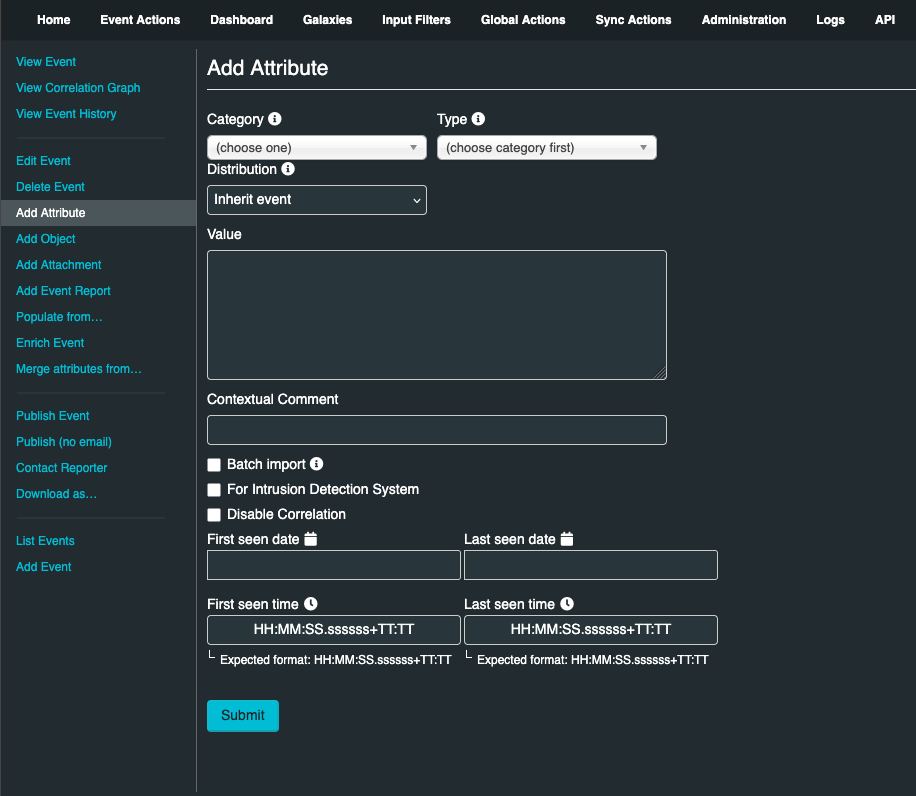
Provide the following data in the Add Attribute page:
Category: This drop-down menu explains the category of the attribute, meaning what aspect of the malware this attribute is describing
Type: Categories determine what aspect of an event they are describing. The Type explains by what means that aspect is being described. As an example, the source IP address of an attack, a source e-mail address or a file sent through an attachment can all describe the payload delivery of a malware. These would be the types of attributes with the category of payload deliver
Distribution: Distribution drop-down menu allows you to control who will be able to see this attribute
Value: The actual value of the attribute, enter data about the value based on what is valid for the chosen attribute type. For example, for an attribute of type ip-src (source IP address), 1.1.1.1 would be a valid value
Contextual Comment: You can add some comments to the attribute that will not be used for correlation but instead serves as purely an informational field
For Intrusion Detection System: This option allows the attribute to be used as an IDS signature when exporting the NIDS data, unless it is being overruled by the white-list.
Batch import: If there are several attributes of the same type to enter (such as a list of IP addresses, it is possible to enter them all into the same value-field, separated by a line break between each line. This will allow the system to create separate lines for each attribute
Adding attachments to events:
Documents including malware itself, reports files from external analysis, or the artifacts dropped by the malware can be attached to an event. Click Add Attachment on the left pane of the event screen to upload any attachment.
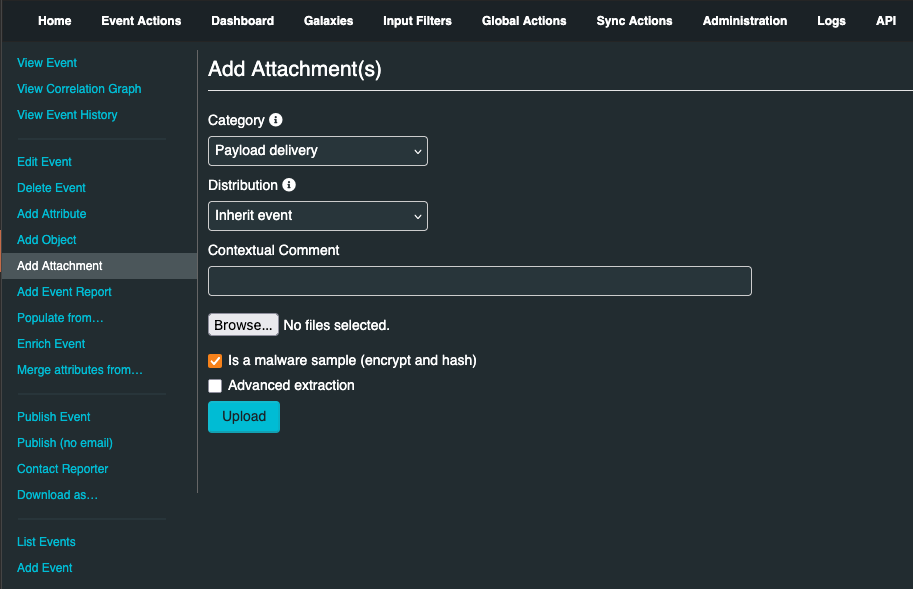
Category: This field describes the file that is going to be attached
Distribution: This drop-down menu allows you to control who will be able to see this attachment
Contextual Comment: You can add some comments to the attribute that will not be used for correlation but instead serves as purely an informational field
Upload field: By hitting browse, you can browse your file system and point the uploader to the file that you want to attach to the attribute
Malware: This check-box marks the file as malware and it will be zipped and protected by the password, to protect the users of the system from accidentally downloading and executing the file. Make sure to tick this if you suspect that the filed is infected, before uploading it
Once all the attributes and attachments that you want to include with the event are included, click Publish Event on the left pane of the event screen.
This will alert the eligible users of it and push the event to instances that your instance connects to. There is an alternate way of publishing an event without alerting any other users, by clicking Publish (no email). This should only be used for minor edits (such as correcting a typo).